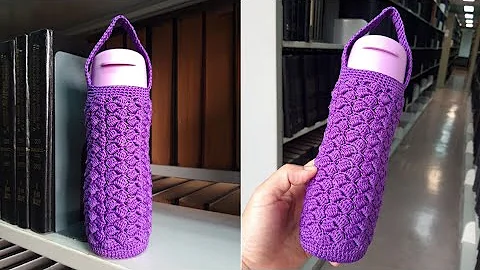
Try This Fun Crochet Project: DIY Mushroom Bag
Table of Contents:
- Introduction
- Materials Needed
- Step 1: Starting with the Magic Ring
- Step 2: Working the Base
- Step 3: Creating the C Part
- Step 4: Making the Strap
- Step 5: Attaching the Back Strap and Cap
- Step 6: Adding White Dots
- Conclusion
Article:
How to Crochet a Cute Mushroom Bag: A Step-by-Step Tutorial
Introduction
Crocheting is a relaxing and creative hobby that allows you to create beautiful and unique items. In this tutorial, we will be showing you how to crochet a cute mushroom bag. This adorable bag is perfect for carrying small items and can be a fun accessory for any outfit. Follow our step-by-step guide to create your very own mushroom bag.
Materials Needed
Before we begin, let's gather all the materials required for this project. You will need:
- Yarn - Choose a color of your choice for the bag and additional colors for decorating.
- Crochet hook - Select an appropriate crochet hook size based on the thickness of your yarn.
- Scissors - Used for cutting yarn.
- Yarn needle - Used for weaving in loose ends and attaching parts.
Step 1: Starting with the Magic Ring
To begin creating your mushroom bag, you will start with a magic ring. This technique allows you to create a tight and seamless circle. Follow these steps:
- Hold the end of your yarn and create a loop, making sure the end is underneath the loop.
- Insert your crochet hook under the loop and grab the working yarn.
- Pull the working yarn through the loop, creating a chain.
- Chain three additional stitches, which will act as your first double crochet.
Step 2: Working the Base
Once you have completed the magic ring, it's time to work on the base of your mushroom bag. Follow these steps:
- Work 12 double crochet stitches into the magic ring, starting from the fourth chain from your hook.
- Pull the tail tightly to close the ring.
- Slip stitch into the top of the chain three to complete the round.
- Chain three and work one double crochet in the same chain three space.
- Continue working two double crochet stitches in each stitch until the end of the round.
- Slip stitch into the top of the chain three to complete the round.
Step 3: Creating the C Part
Now, let's move on to creating the C part of the mushroom bag. This section will give your bag its unique shape. Follow these steps:
- Repeat the pattern used for the base, but this time, work a total of nine rounds to create the C shape.
- After completing the nine rounds, slip stitch into the top of the chain three to finish.
Step 4: Making the Strap
The strap of the mushroom bag is what allows you to carry it comfortably. Follow these steps to create the strap:
- Leave a long tail of yarn and attach it to one corner of the mushroom cap.
- Create a chain of desired length, ensuring it is long enough to go around your back and shoulder.
- Fasten off the yarn and cut the excess.
Step 5: Attaching the Back Strap and Cap
To complete your mushroom bag, you need to attach the back strap and cap. Follow these steps:
- Align the back strap with the corners of the C part of the bag.
- Attach one side of the back strap to the corner by weaving the yarn through the stitches.
- Repeat the process for the other side of the back strap.
- Next, count three rows on the cap and pass the back strap through.
- Secure the strap on both sides of the cap.
Step 6: Adding White Dots
To add a whimsical touch to your mushroom bag, you can attach white dots using a contrasting color of yarn. Follow these steps:
- Create a magic ring and chain one.
- Work eight half double crochet stitches into the magic ring.
- Slip stitch into the first stitch to complete the round.
- Attach the white dots to the back of the bag in a pattern of your choice.
Conclusion
Congratulations! You have now successfully crocheted a cute mushroom bag. This fun and stylish accessory can be a perfect addition to your wardrobe or a thoughtful handmade gift. Remember to personalize it and get creative with colors and embellishments. Enjoy your new bag and happy crocheting!
Highlights:
- Learn how to crochet a cute mushroom bag.
- Step-by-step instructions for beginners.
- Customize your bag with different colors and decorations.
- A fun and practical accessory for any outfit.
FAQ:
Q: Can I use different yarn and hook sizes for this project?
A: Yes, feel free to experiment with different yarn and hook sizes to achieve the desired size and texture for your mushroom bag.
Q: How long does it take to crochet a mushroom bag?
A: The time taken to complete this project depends on your crochet speed and experience. It can take a few hours to a couple of days.
Q: Can I make the bag larger or smaller?
A: Absolutely! You can adjust the size of your mushroom bag by increasing or decreasing the number of rounds worked in the base and C part.
 WHY YOU SHOULD CHOOSE BEAUTYBADY


