Master the Art of Whipstitching Felt
Table of Contents:
- Introduction
- What is whip stitching on felt?
- Materials needed for whip stitching on felt
- Step-by-step guide to whip stitching on felt
4.1 Preparing the thread and needle
4.2 Starting the whip stitch
4.3 Stitching the felt layers together
4.4 Dealing with the thickness of felt
4.5 Pinning vs. pinching the layers
4.6 Avoiding tight stitches
4.7 Tying off at the end
- Tips and tricks for successful whip stitching on felt
- Pros and cons of whip stitching on felt
- Conclusion
Whip Stitching on Felt: A Step-by-Step Guide for Sewing Softies
Whip stitching is a popular technique used in sewing to close softie openings or seams. While it is commonly used on regular fabric, whip stitching on felt requires some special considerations. In this article, we will dive into the art of whip stitching on felt and explore the techniques and tips to achieve clean and professional-looking stitches.
Introduction
Whip stitching is a simple yet effective method for joining two layers of felt together, commonly seen in softie making. It involves sewing through the fabric layers in an over-and-under pattern, creating a neat and secure seam. In this guide, we will walk you through the process of whip stitching on felt, providing you with the knowledge and confidence to sew beautiful and durable felt projects.
What is whip stitching on felt?
Whip stitching on felt refers to the process of sewing two pieces of felt together using a simple over-and-under stitch. Unlike other fabrics, felt is thicker and requires some adjustments in the stitching technique. With whip stitching on felt, the stitches are often intentionally visible, adding a decorative touch to the finished softie.
Materials needed for whip stitching on felt
Before diving into the actual stitching process, it is important to gather the necessary materials. Here are the things you will need:
- Felt pieces to be stitched together
- Embroidery thread or regular sewing thread
- Needle suitable for the thread thickness
- Scissors
- Pins or clips (optional)
Having these materials ready will ensure a smooth and enjoyable whip stitching experience.
Step-by-step guide to whip stitching on felt
Now let's take a detailed look at the process of whip stitching on felt, step-by-step.
4.1 Preparing the thread and needle
To begin, select a thread color that matches or complements the felt color. You can use embroidery thread for a decorative touch or regular sewing thread for a more subtle look. Thread your needle with a suitable length of thread and knot the end securely.
4.2 Starting the whip stitch
Starting from the inside of the felt piece, poke the needle through the back layer and out onto the backside. This ensures that the thread and tail are hidden between the fabric layers. Position the felt pieces so that the edge you wish to stitch is aligned.
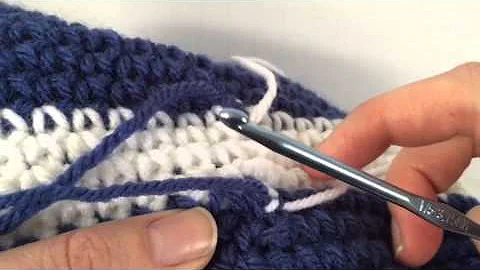
4.3 Stitching the felt layers together
Take your first stitch, approximately a sixteenth of an inch from the fabric edge, from front to back. Adjust the tension as needed to position the stitch correctly. Continue stitching by taking small, evenly-spaced stitches, always going from the front to the back of the felt.
4.4 Dealing with the thickness of felt
Felt is thicker compared to other fabrics, so it is crucial to sew straight through the two layers to maintain consistent stitch placement. Ensure that the needle goes in and comes out about the same distance from the fabric edge to prevent uneven stitches.
4.5 Pinning vs. pinching the layers
Rather than pinning the felt layers together, it is recommended to pinch them together while sewing. Pinning can lead to the thread looping around the pins, causing inconvenience and potentially affecting the quality of the stitches.
4.6 Avoiding tight stitches
When stitching, avoid pulling the thread too tight, as this can distort the edge of the felt and create a scalloped effect. The stitches should not pull the felt layers too tightly together, but rather snugly fit against the surface without distorting the fabric.
4.7 Tying off at the end
When you reach the end of your stitching or run out of thread, tie off the stitch by creating a small knot. Take a final stitch and pull it down to create a loop. Pass the needle through the loop twice and use your fingernails to snug the knot down. Flip the felt over to the backside and bury the tail of the thread by inserting the needle anywhere near the exiting thread. Trim any excess thread.
Tips and tricks for successful whip stitching on felt
- Experiment with different thread colors or thicknesses to create unique effects.
- Practice on scrap felt before stitching your final project to get comfortable with the technique.
- Use good lighting while stitching to ensure precision.
- Take breaks if your hand gets tired to maintain stitching accuracy.
Pros and cons of whip stitching on felt
Pros:
- Creates a secure and durable seam in felt projects.
- Allows for easy visibility of stitches, adding decorative elements to the softie.
- Can be done with basic sewing supplies.
Cons:
- The stitches may be visible, which may not be desirable for certain projects.
- Requires attention to maintain consistent stitch placement due to the thickness of felt.
Conclusion
Whip stitching on felt is an essential skill for anyone interested in creating softies or working with felt. By following the step-by-step guide and understanding the tips and tricks, you can confidently sew beautiful felt creations. Remember to practice and experiment with different techniques to develop your unique style. Happy stitching!
Highlights:
- Learn how to whip stitch on felt for sewing softies
- Step-by-step guide with detailed instructions and tips
- Techniques for dealing with the thickness of felt
- Pros and cons of whip stitching on felt
- Master the art of whip stitching and create beautiful felt projects
FAQs:
Q: Can I use regular sewing thread for whip stitching on felt?
A: Yes, regular sewing thread works well for whip stitching on felt. However, embroidery thread can add a decorative touch to your stitches.
Q: Can I hide the stitches in whip stitching on felt?
A: Whip stitching on felt is often done with visible stitches, which can add a decorative element to the final project. If you prefer to hide the stitches, you can use a matching thread color and sew closer to the edge of the fabric.
Q: How do I prevent the felt edges from distorting when whip stitching?
A: To prevent the felt edges from distorting, avoid pulling the stitches too tight. Pull them snugly against the surface of the felt, but not so tight that they warp the fabric edge.
Q: Can I use pins instead of pinching the layers together when whip stitching on felt?
A: It is not recommended to use pins when whip stitching on felt, as the thread can loop around the pins and cause inconvenience. Pinching the layers together as you sew is a better alternative.
Q: Can I use whip stitching on felt for other types of sewing projects?
A: While whip stitching is commonly used for sewing softies, it can also be applied to other felt sewing projects like bags, ornaments, or accessories. Adjusting the stitch spacing and thread color can create different effects.


 WHY YOU SHOULD CHOOSE BEAUTYBADY