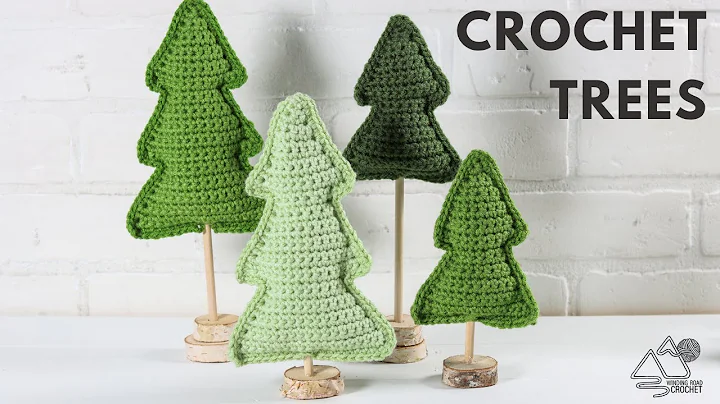
Stylish Crochet Leg Warmers
Table of Contents:
- Introduction
- Selecting the Yarn and Hook
- Making a Slip Knot
- Creating the Foundation Chain
- Joining and Starting the First Row
- Making Single Crochets in the Round
- Adding Additional Rows
- Changing Yarn Colors
- Increasing and Decreasing Stitches
- Finishing the Project
- Weaving in Loose Ends
- Conclusion
Introduction
Crocheting is a popular hobby that allows you to create beautiful and unique pieces using yarn and a crochet hook. Whether you're a beginner or an experienced crocheter, this guide will help you learn the basics and guide you through the process of creating your own crochet project. From selecting the appropriate yarn and hook to weaving in loose ends, each step will be covered in detail. So grab your supplies and get ready to embark on a creative and rewarding journey!
1. Selecting the Yarn and Hook
Before you start your crochet project, it's essential to choose the right yarn and hook size. The yarn you select should be suitable for your project's purpose, such as a soft yarn for a cozy blanket or a durable yarn for a sturdy bag. Additionally, consider the color and texture of the yarn to achieve the desired aesthetic appeal. The hook size will depend on the yarn's thickness, with smaller hooks used for thinner yarns and larger hooks for thicker yarns.
2. Making a Slip Knot
A slip knot is the first step in starting a crochet project. It creates a secure loop on your crochet hook for you to begin crocheting. To make a slip knot, hold the end of the yarn between your fingers and form a loop. Cross the yarn over the loop and tuck it underneath. Insert your crochet hook into the loop and pull the yarn through to create the slip knot. Adjust the tension to ensure it's snug but not too tight.
3. Creating the Foundation Chain
The foundation chain serves as the base for your crochet project. To make a chain, yarn over (bring the yarn over the hook from back to front) and pull it through the slip knot loop. This process creates the first chain stitch. Repeat the yarn over and pull through step to add more stitches to the chain. The number of chains required will depend on your project's size and pattern instructions.
4. Joining and Starting the First Row
To start the first row, join the last chain stitch to the first chain stitch. Insert your crochet hook into the first chain stitch, yarn over, and pull the yarn through both loops on the hook. This step joins the chain into a circle. Now you can begin crocheting by making single crochet stitches all around the circle. The chain one at the beginning of each round acts as the first stitch.
5. Making Single Crochets in the Round
Single crochet stitches are the most basic crochet stitches. To make a single crochet, insert your hook under the V-shape of the stitch, yarn over, and pull the yarn through to create two loops on the hook. Yarn over again and pull it through both loops. Repeat this process for each stitch in the round. This creates a round of single crochets, and you can continue to make more rounds as needed.
6. Adding Additional Rows
Continue adding rounds of single crochet stitches until your project reaches the desired size. Remember to work in a spiral, making sure not to join each round. This technique creates a seamless appearance without obvious joins. You can count the stitches after each round to ensure you have the correct number and maintain the pattern's integrity.
7. Changing Yarn Colors
To add variety and create visual interest in your crochet project, you can change yarn colors. Start by finishing the last stitch before the color change by leaving two loops on the hook. Drop the current yarn and pick up the new yarn color. Yarn over with the new color, and pull it through the two loops on the hook to complete the stitch. Continue crocheting with the new color as instructed in the pattern.
8. Increasing and Decreasing Stitches
Sometimes you may need to increase or decrease the number of stitches to shape your crochet project. To increase stitches, crochet two stitches into the same stitch space. This increases the stitch count and creates a wider shape. To decrease stitches, combine two stitches into one. This reduces the stitch count and creates a narrower shape. Follow the pattern instructions to determine when and how to increase or decrease stitches.
9. Finishing the Project
Once you've reached the desired size and completed the necessary rounds, it's time to finish your crochet project. Cut the yarn, leaving a tail. Yarn over and pull it through the last stitch to secure it. Use a crochet hook or a yarn needle to weave in the loose ends, keeping them hidden within the stitches. This step ensures a neat and professional-looking finish to your crochet work.
10. Weaving in Loose Ends
Weaving in loose ends is a crucial step to ensure that your crochet project is secure and does not unravel over time. Use a crochet hook or a yarn needle to carefully thread the loose ends into the stitches in various directions. This helps to distribute the tension and prevent the ends from coming undone. Trim any excess yarn, leaving a small tail for added security.
Conclusion
Crocheting is a rewarding and versatile craft that allows you to create beautiful and functional items. By following the steps outlined in this guide, you can confidently embark on your crochet journey. Remember to choose the right yarn and hook, master the basic stitches, and follow a pattern or your creative intuition. With practice and patience, you'll be able to create unique and personalized crochet projects that showcase your skills and creativity.
Highlights:
- Learn the basics of crocheting, from selecting the right yarn and hook to weaving in loose ends.
- Discover the art of making a slip knot and creating the foundation chain.
- Master the single crochet stitch and learn how to make it in the round.
- Explore the technique of changing yarn colors to add visual interest to your projects.
- Understand the importance of increasing and decreasing stitches to shape your crochet work.
- Finish your crochet projects with confidence and create professional-looking results.
- Weave in loose ends to secure your work and prevent unraveling.
FAQ:
Q: Can I use any yarn and hook for crocheting?
A: It's essential to select the appropriate yarn and hook for your project to achieve the desired results. Thicker yarns require larger hooks, while thinner yarns need smaller hooks. Consider the purpose and aesthetic of your project when choosing the materials.
Q: How do I change yarn colors in my crochet project?
A: To change yarn colors, finish the last stitch before the color change, drop the current yarn, and pick up the new yarn. Yarn over with the new color and complete the stitch. Continue crocheting with the new color as instructed in the pattern.
Q: What is the purpose of weaving in loose ends?
A: Weaving in loose ends is essential to secure your crochet work and prevent unraveling. By threading the loose ends into the stitches, you distribute the tension and ensure the ends stay in place. Trim any excess yarn for a neat finish.


 WHY YOU SHOULD CHOOSE BEAUTYBADY