Master the Easy Flat Stitch Join in Crochet
Table of Contents:
- Introduction
- Purpose of the Flat Stitch Join
- Tools Needed for the Flat Stitch Join
- Step-by-Step Instructions for the Flat Stitch Join
4.1. Looping the Yarn
4.2. Working with the Back Loops
4.3. Pulling the Yarn Through
4.4. Creating Consistent Joins
- Alternatives to the Flat Stitch Join
5.1. Whip Stitch Join
5.2. Invisible Seam
- Tips and Tricks for a Flawless Flat Stitch Join
- Conclusion
Flat Stitch Join: A Step-by-Step Tutorial
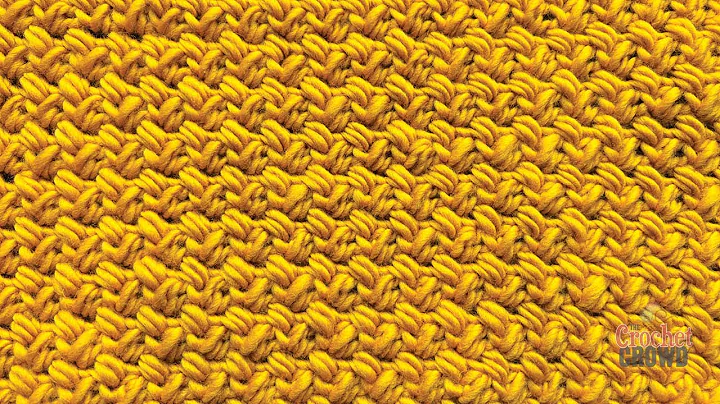
Crocheting is a beloved craft that allows us to create beautiful and functional items. However, when it comes to joining crochet pieces together, it can be a bit tricky to achieve a seamless and sturdy finish. In this tutorial, we will explore the flat stitch join technique, its purpose, and how to execute it flawlessly. Whether you're joining squares for an afghan or connecting hexagons for a crochet ball, this join can be a valuable addition to your crocheting skill set.
1. Introduction
Crochet, as a craft, offers endless possibilities for creativity and self-expression. From colorful blankets to intricate garments, the options are limitless. One aspect of crochet that can be challenging is the joining of individual pieces to form a cohesive whole. The flat stitch join technique aims to address this challenge by creating a seamless and flat join that blends seamlessly with the rest of the project.
2. Purpose of the Flat Stitch Join
Before delving into the details of the flat stitch join, it's essential to understand its purpose. The primary goal of this join is to securely connect crochet pieces while maintaining a flat and unobtrusive seam line. Unlike other joining methods that can result in bulky or uneven seams, the flat stitch join creates a smooth and professional finish. It is particularly suitable for projects that require a flat surface, such as afghans, where flexibility is not a significant concern.
3. Tools Needed for the Flat Stitch Join
To successfully execute the flat stitch join technique, you will need a few essential tools: a crochet hook and a tapestry needle. The crochet hook will be used to work the join, while the tapestry needle will come in handy for weaving in the loose ends. Gather these tools before starting the join, ensuring you have the correct size crochet hook for your project.
4. Step-by-Step Instructions for the Flat Stitch Join
Now that we have covered the basics let's dive into the step-by-step process of executing the flat stitch join. Follow these instructions carefully to achieve a clean and professional-looking finish.
4.1 Looping the Yarn
Before starting the join, leave a longer tail of yarn to facilitate weaving in the ends later. Make sure not to create a slip knot at this point. Instead, loop the yarn around your crochet hook, preparing it for the join.
4.2 Working with the Back Loops
To begin the flat stitch join, focus your attention on the back loop of each crochet piece. The back loop is the loop furthest away from you on one piece and closest to you on the other. By inserting your hook into the corresponding back loops, you'll create a secure and seamless connection. Be mindful of the orientation of your crochet pieces, as this will determine which loop to work with.
4.3 Pulling the Yarn Through
Once you have inserted your hook into the back loop, grab the loop of yarn and pull it through both the back loop and the loop on your hook. This action establishes the yarn's path through the join, ensuring it lies flat and hidden within the stitches. Repeat this process for each pair of back loops, moving systematically across the join.
4.4 Creating Consistent Joins
Consistency is key when executing the flat stitch join. To achieve a polished look, maintain a consistent approach throughout the join. Avoid randomly selecting which back loop to work with; instead, establish a pattern and stick to it. This consistency will result in a seamless and visually pleasing finished product.
5. Alternatives to the Flat Stitch Join
While the flat stitch join has its merits, it may not be everyone's preferred method. If you find this join challenging or wish to explore other options, consider the following alternatives:
5.1 Whip Stitch Join
The whip stitch join is an alternative method for connecting crochet pieces. It involves using a tapestry needle and a length of yarn to sew the pieces together. This method creates a visible seam on the right side of the work but offers flexibility and durability. Learn how to execute the whip stitch join in our separate tutorial.
5.2 Invisible Seam
The invisible seam, also known as the mattress stitch, creates a seamless and nearly invisible join. It is commonly used in knitting but can also be adapted for crochet projects. By utilizing the loops between stitches on each crochet piece, the invisible seam achieves a smooth and flat result. Detailed instructions for the invisible seam can be found in our dedicated tutorial.
6. Tips and Tricks for a Flawless Flat Stitch Join
To make your experience with the flat stitch join even more successful, we have compiled a few tips and tricks:
- Take your time: The flat stitch join requires precision and attention to detail. Slow down and ensure each stitch is executed correctly before moving on to the next.
- Practice on scrap yarn: If you're new to the flat stitch join or want to improve your technique, practice on scrap yarn before working on your main project.
- Weave in ends thoroughly: To achieve a professional finish, take the time to weave in the loose ends of your join. This step helps to secure the stitches and ensure a neat appearance.
7. Conclusion
The flat stitch join is a valuable technique in the world of crochet, allowing for seamless and flat connections between individual pieces. While it may not be suitable for every project, it serves its purpose well in specific applications. By following the step-by-step instructions, experimenting with alternatives, and incorporating helpful tips, you can confidently incorporate the flat stitch join into your crochet repertoire. Embrace the versatility of this join, and enjoy the process of creating beautiful and seamless crochet projects. Happy crocheting!
Highlights:
- Learn how to execute the flat stitch join, a seamless and flat joining technique in crochet.
- Understand the purpose and benefits of the flat stitch join for various crochet projects.
- Gather the necessary tools, including a crochet hook and tapestry needle, to perform the join successfully.
- Follow the step-by-step instructions to create a professional-looking and sturdy flat stitch join.
- Explore alternative joining methods such as the whip stitch join and invisible seam.
- Discover tips and tricks for flawless flat stitch joins, including patience, practice, and thorough weaving of ends.
- Embrace the versatility of the flat stitch join and enjoy the process of creating beautiful crochet projects.
FAQ:
Q: Can I use the flat stitch join for all crochet projects?
A: The flat stitch join is most suitable for projects that require a flat surface, such as afghans or flat motifs. For projects that require flexibility or stretch, alternative joins may be more appropriate.
Q: How can I make my flat stitch join look consistent?
A: Consistency is important for a polished result. Choose a pattern or approach and stick to it throughout the join. Avoid randomly selecting back loops to work with for a visually pleasing outcome.
Q: Can I use the flat stitch join in knitting projects?
A: The flat stitch join is specifically designed for crochet projects. However, you can adapt a similar technique called the mattress stitch, commonly used in knitting, for seamless joins in knit pieces.
 Beauty


 WHY YOU SHOULD CHOOSE BEAUTYBADY