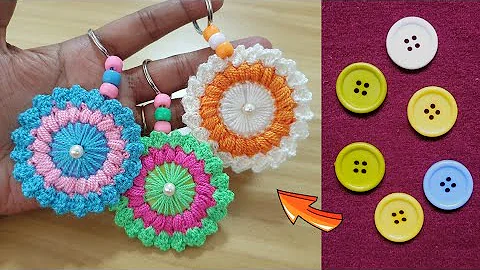
Master the Art of Crocheting Ovals
Table of Contents:
- Introduction
- Materials Needed
- Step 1: Creating a Slipknot
- Step 2: Chain Stitching
- Step 3: Single Crochet
- Step 4: Turning the Work
- Step 5: Increasing for Oval Shape
- Step 6: Marking the Top Stitch
- Step 7: Continuing the Rounds
- Step 8: Finishing the Oval
- Conclusion
Crochet Tutorial: How to Make an Oval Shape
Crochet hangouts are the perfect opportunity to learn and experiment with unique crochet shapes that go beyond the usual circles, rectangles, and triangles. In this tutorial, we will focus on creating an oval shape, which is particularly popular for smaller projects like animal-inspired crafts, baby booties, and even clothing items like mittens and gloves. So grab your favorite yarn and hook, and let's dive into creating the perfect oval!
Step 1: Creating a Slipknot
To start our crochet journey, we first need to create a slipknot. This is a loop that will serve as the foundation for our stitches. If you're unfamiliar with creating a slipknot, don't worry! There are plenty of resources available online, including videos on Crochet Hangout's website or YouTube channel. Take your time to master this technique before moving forward.
Step 2: Chain Stitching
Once you have your slipknot ready, it's time to chain stitch. In this tutorial, we will start with a chain of ten stitches to showcase the oval shape more clearly. However, feel free to adapt the number of stitches based on your project's requirements. Remember, versatility is key in crochet!
Step 3: Single Crochet
Now that we have our chain ready, it's time to dive into single crochet stitches. If you're unfamiliar with this stitch, don't worry! There are plenty of resources available on the Crochet Hangout website or YouTube channel to guide you through the process. With the single crochet stitch, we will work our way across the chain, creating ten single crochet stitches in total.
Step 4: Turning the Work
Once we reach the end of the row, we'll need to turn our work upside down. By doing so, we will be working on both the top and bottom of the chain to create the oval shape. Make sure to identify the first and last stitches of the row and mark them using a paperclip or a stitch marker. This will help us keep track of the increasing rounds.
Step 5: Increasing for Oval Shape
To achieve a larger oval shape, we need to implement increases. The initial increase will be made at the top stitch, where we previously marked our work. In this round, instead of doing a single crochet, we will do three single crochets in the marked stitch. This increase will start to give our shape its desired form.
Step 6: Marking the Top Stitch
Don't forget to mark the newly created top stitch! This is crucial for future increases and will help you keep track of your progress. Simply place a paperclip or a stitch marker in the middle stitch of the oval. As you gain proficiency, you may find that you no longer need the markers, but they can be extremely helpful for beginners.
Step 7: Continuing the Rounds
With the initial increase made, we can now continue to work our way around the oval. The following rounds will consist of one single crochet in each stitch, except for the marked stitch where we will again do three single crochets. Keep repeating this pattern until you achieve the desired size for your oval.
Step 8: Finishing the Oval
Congratulations! You've successfully created your crochet oval. To finish off, you can either slip stitch and cut the yarn, or continue with additional rounds depending on your project's needs. Experiment with different stitch heights, such as half double crochets or double crochets, to add variation to your ovals.
Conclusion
In this tutorial, we explored the art of creating an oval shape in crochet. By following the step-by-step instructions and tips provided, you can easily crochet unique shapes beyond the usual ones. Remember, crochet is all about experimentation and creativity, so don't be afraid to adapt and modify the techniques to suit your preferences. Now it's time to put your newfound skills to the test and create beautiful ovals in your crochet projects. Happy crocheting!
Highlights:
- Learn how to crochet an oval shape.
- Perfect for smaller projects and clothing items.
- Adapt the number of stitches to your needs.
- Increase stitches for a larger oval shape.
- Mark your work to track progress.
- Experiment with different stitch heights.
FAQ:
Q: Can I use a different yarn weight for crocheting the oval shape?
A: Absolutely! While the tutorial specifically mentions using acrylic worsted yarn, you can use any yarn weight that suits your project. Just make sure to adjust your hook size accordingly.
Q: Can I make different sizes of ovals using this tutorial?
A: Yes, definitely! The number of stitches you start with, as well as the number of increase rounds, will determine the size of your oval. Feel free to experiment and create ovals of different sizes.
Q: What other shapes can I crochet besides ovals?
A: The possibilities are endless! You can explore various shapes such as stars, hearts, diamonds, or even freeform shapes. Crochet offers a wide range of creative opportunities for shaping your projects.
Q: How can I modify the oval shape to make it more elongated or wider?
A: If you want a more elongated oval, you can increase the number of stitches at the beginning or end of each row. To make it wider, you can increase the number of stitches in the middle of the row. Experiment with different stitch placements to achieve your desired shape.
 WHY YOU SHOULD CHOOSE BEAUTYBADY


