Master the Art of Crocheting a Beautiful Scallop Edge on a Kitchen Towel
Table of Contents:
- Introduction
- Materials Needed
- Step 1: Marking the Hem
- Step 2: Making the Blanket Stitch
- Step 3: Finishing Off the Blanket Stitch
- Step 4: Starting the Scalloped Edge
- Step 5: Creating the Scallops
- Step 6: Finishing Off the Scalloped Edge
- Tips and Tricks
- Conclusion
Introduction
Welcome to this crochet tutorial on how to add a crochet border or edging to a non-crocheted item. In this tutorial, we will be focusing on adding a crochet border to a dishcloth to give it a unique and handmade touch. This project is beginner-friendly, making it perfect for those who have just started crocheting or have some experience. The best part is that it is quick to make and adds a beautiful touch to any item. So, let's get started and learn how to make the blanket stitch and the scalloped edging.
Materials Needed
- Dishcloth or any non-crocheted item
- Yarn (cotton or cotton blend)
- Crochet hook (size F or 3.75mm for cotton ease yarn, size H or 5mm for sugar and cream yarn)
- Embroidery needle
Step 1: Marking the Hem
To begin, we will mark the hem of the item where we will be attaching the crochet border. If you are working with a dishcloth, mark the halfway point of the hem and then create a mark one quarter of an inch down. The number of marks will determine the number of stitches you will be making across the hem. Make sure that the number of stitches can be divided by four plus one.
Step 2: Making the Blanket Stitch
Using a contrasting thread, insert the embroidery needle from the hem side underneath and come up at the marked point. This will be where you bury the knot. Make a loop around the edge, going back up through the marked point. Repeat this process for extra security. Insert the needle just underneath the loop, ensuring that the working yarn comes from the left side of the loop.
Step 3: Finishing Off the Blanket Stitch
Continue inserting the needle under the marked point and pulling it through the loop to create the blanket stitch. Repeat this process until you reach the end of the hem. For the last stitch, make sure the number of stitches is divisible by four plus one. To finish off, bring the thread down to the base of the stitch and make a knot. Then, bury the tail by inserting the needle across the hem and cutting the excess thread.
Step 4: Starting the Scalloped Edge
Now, we will move on to creating the scalloped edge. Use a different yarn, like cotton ease yarn or sugar and cream yarn. Attach the yarn to the blanket stitch by inserting the crochet hook and pulling the yarn through, then tie a knot.
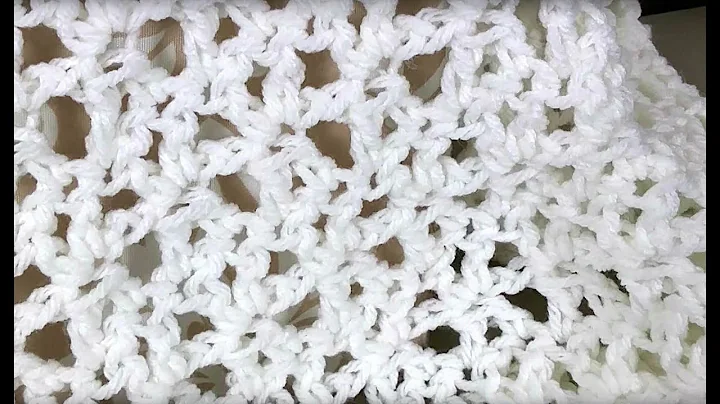
Step 5: Creating the Scallops
To create the scallops, chain one and single crochet in the same stitch. Skip a stitch and then make five double crochets in the next stitch. Repeat this pattern of skipping a stitch and making five double crochets until you reach the end of the hem.
Step 6: Finishing Off the Scalloped Edge
To finish off the scalloped edge, single crochet in the last stitch. Cut the yarn, leaving a tail, and pull it through the loop on the hook to secure it. Weave in the ends to ensure they are secure, and your scalloped edge is complete.
Tips and Tricks
- Use a contrasting thread for the blanket stitch to make it easier to see.
- Experiment with different yarns and hook sizes to achieve different looks and textures.
- Follow the specific measurements for the blanket stitch based on the yarn you are using (quarter inch for cotton ease yarn, 3/8 inch for sugar and cream yarn).
- Weave in the ends to ensure a neat and professional finish to your project.
Conclusion
Adding a crochet border or edging to a non-crocheted item is a fun and creative way to personalize and enhance its appearance. With the blanket stitch and scalloped edge techniques, you can create beautiful and unique borders that will make your items stand out. So, grab your materials and get started on your own crochet border project today!
Article Title: How to Add a Crocheted Border or Edging to a Non-Crocheted Item
Hey guys, it's Melanie! Welcome back to my channel. Today, I'm going to teach you how to add a crocheted border or edging to a non-crocheted item. This technique is perfect for adding a handmade and beautiful touch to everyday items, like a dishcloth. Whether you're a beginner or have some crocheting experience, this project is super quick and beginner-friendly. So, let's dive in and I'll show you how to make the blanket stitch and the scalloped edging.
Step 1: Marking the Hem
The first step in adding a crocheted border is marking the hem where we will be attaching the crochet stitches. Take your non-crocheted item, like a dishcloth, and locate the halfway point of the hem. Make a mark slightly inward from the edge. Next, make a mark one-quarter of an inch down from the first mark. These marks will serve as your guide for creating the stitches.
Step 2: Making the Blanket Stitch
Now that we have marked the hem, it's time to start the blanket stitch. Grab a contrasting thread that will allow you to see the stitches clearly. Take an embroidery needle with a larger eye, making it easier to thread the yarn. Insert the needle from the hem side underneath and come up at the first marked point. This is where you will bury the knot. Create a loop around the edge of the fabric and bring the needle back up through the marked point. Repeat this process for extra security.
Step 3: Finishing Off the Blanket Stitch
Continue creating the blanket stitch by inserting the needle just underneath the loop and pulling it through. This will secure the stitch. Repeat this process for all the marked points along the hem until you reach the end. For the last stitch, ensure that the number of stitches can be divided by four plus one. To finish off, bring the thread down to the base of the stitch and make a knot. Then, bury the tail by inserting the needle across the hem and cutting the excess thread. This will give your work a clean and professional finish.
Step 4: Starting the Scalloped Edge
Now, let's move on to creating the scalloped edge. Choose a different yarn that complements your item. Cotton ease yarn or sugar and cream yarn are great options. We will also need a crochet hook, size F or 3.75mm for cotton ease yarn, and size H or 5mm for sugar and cream yarn. Attach the yarn to the blanket stitch by inserting the crochet hook and pulling the yarn through. Tie a knot to secure the yarn.
Step 5: Creating the Scallops
To create the scalloped edge, start by chaining one. Then, single crochet in the same stitch where you attached the yarn. This will anchor the scallops. Next, skip a stitch and make five double crochets in the next stitch. Repeat this pattern of skipping a stitch and making five double crochets until you reach the end of the hem. This will create a beautiful and decorative scalloped edge.
Step 6: Finishing Off the Scalloped Edge
To finish off the scalloped edge, single crochet in the last stitch. Cut the yarn, leaving a tail, and pull it through the loop on the hook to secure it. To ensure a neat and professional finish, weave in the ends using a yarn needle. This will hide the loose ends and give your work a polished look.
Now you have successfully added a crocheted border or edging to a non-crocheted item. The combination of the blanket stitch and scalloped edge creates a unique and personalized touch to your everyday items. Experiment with different yarns and hook sizes to achieve different looks and textures. You can also use contrasting threads and colors to make your design stand out even more.
Adding a crocheted border is a great way to elevate the look of your dishcloths, towels, or any other non-crocheted items. It adds a handmade and beautiful touch, making them unique and special. So, let your creativity flow and start experimenting with different patterns and designs. Happy crocheting!
 Beauty


 WHY YOU SHOULD CHOOSE BEAUTYBADY