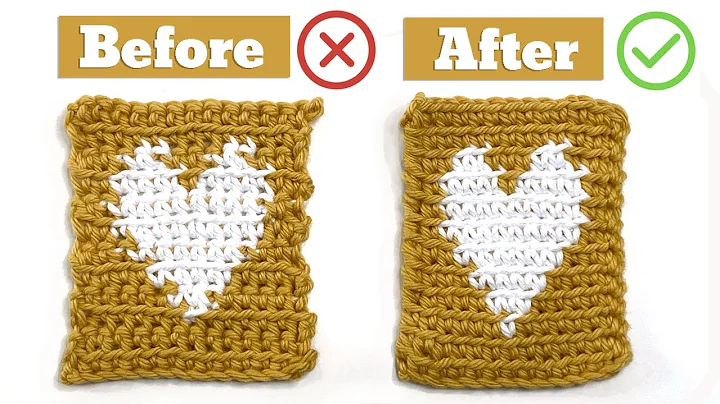
Master the Art of Crochet Gingham Blankets
Table of Contents
- Introduction
- Understanding the Gingham Stitch
- Materials Needed
- Step-by-Step Instructions for the Gingham Stitch
- 4.1. Chain the Required Amount
- 4.2. Start the Initial Row
- 4.3. Adding a New Color
- 4.4. Crocheting Over the White
- 4.5. Switching to a Darker Color
- 4.6. Weaving in Ends
- Tips and Tricks for Successful Gingham Stitch
- Variations and Patterns
- Conclusion
Understanding the Gingham Stitch
The gingham stitch is a popular crochet technique that creates a beautiful checked pattern reminiscent of traditional gingham fabric. It is a versatile stitch that can be used to make blankets, scarves, and other projects. In this article, we will explore the ins and outs of the gingham stitch, including how to create the stitch, the materials needed, and tips for success.
Materials Needed
Before you start crocheting the gingham stitch, you will need a few materials. Here's what you'll need:
- Yarn: Choose two or more colors of yarn that complement each other and create the gingham effect you desire.
- Crochet Hooks: Select the appropriate hook size for your yarn. It is recommended to start with a smaller hook for the initial row to achieve a tighter foundation.
- Scissors: You'll need a pair of scissors to cut the yarn when changing colors.
- Tapestry Needle: A tapestry needle will come in handy for weaving in the ends of your yarn.
Step-by-Step Instructions for the Gingham Stitch
4.1. Chain the Required Amount
To get started with the gingham stitch, you'll need to chain the required amount of stitches. The number of chains will depend on your pattern and the size of your project. Make sure to chain a multiple of the desired box size, as this will be the basis for your gingham checks.
4.2. Start the Initial Row
After chaining, start the initial row by working single crochets across. If you want the initial row to be tighter, you can use a smaller hook. Crochet a set number of single crochets, usually five, before changing colors.
4.3. Adding a New Color
To add a new color in the gingham stitch, simply bring the new color yarn into your work, leaving a small tail that you can weave in later. Continue crocheting over the previous color, carrying it along the side. Repeat this process whenever you want to change colors, ensuring that the medium color is used consistently throughout the project.
4.4. Crocheting Over the White
When switching to the white color, crochet over it while working with the medium color. This will create the checked effect of the gingham stitch. Keep the tension even to ensure a neat and uniform appearance.
4.5. Switching to a Darker Color
If you want to introduce a darker color into your gingham stitch, simply follow the same process as adding a new color. Bring the new color yarn into your work, leaving a tail and crochet over the previous color. Alternate between the medium and darker color to achieve the desired gingham pattern.
4.6. Weaving in Ends
Once you've finished your gingham stitch project, don't forget to weave in the loose ends. Use a tapestry needle to neatly secure the ends, ensuring a polished and professional finish.
Tips and Tricks for Successful Gingham Stitch
Here are a few tips and tricks to make your gingham stitch projects a success:
- Choose colors that have enough contrast to create a noticeable checkered effect, but also complement each other harmoniously.
- Experiment with different hook sizes to achieve the desired tension and fabric drape.
- Practice weaving in ends as you go to minimize the amount of finishing work required at the end.
- Check your gauge regularly to ensure consistent stitch size and tension throughout your project.
- Have fun and get creative with the gingham stitch by incorporating different patterns and variations.
Variations and Patterns
The gingham stitch offers endless possibilities for creativity. Once you have mastered the basic technique, you can try out different variations and patterns. Experiment with different box sizes, color combinations, and stitch placements to create unique designs that suit your style.
Conclusion
The gingham stitch is a versatile and visually appealing crochet technique that can add a touch of charm to a wide range of projects. With the right materials, practice, and a little creativity, you can create beautiful gingham stitch items that are sure to impress. So grab your crochet hook, choose your colors, and start stitching your way to gingham perfection!
Highlights
- Learn how to crochet the gingham stitch
- Create beautiful checked patterns with ease
- Use the gingham stitch for blankets, scarves, and more
- Experiment with different colors and variations
- Master the art of weaving in ends for a polished finish
- Unlock your creativity and make unique gingham stitch designs
FAQ
Q: Can I use any colors for the gingham stitch?
A: While you can use any colors you like, it is important to choose colors that have enough contrast to create a noticeable gingham effect.
Q: How do I weave in the ends in the gingham stitch?
A: To weave in the ends, use a tapestry needle and thread the yarn through the stitches or under the loops to secure it. Trim the excess yarn for a neat finish.
Q: Can I make the gingham stitch larger or smaller?
A: Yes, you can adjust the size of the gingham stitch by changing the box size and the number of stitches you work across and up.
Q: Are there any specific patterns or variations for the gingham stitch?
A: The gingham stitch offers endless possibilities for creativity. You can experiment with different box sizes, color combinations, and stitch placements to create unique designs that suit your style.
 WHY YOU SHOULD CHOOSE BEAUTYBADY


