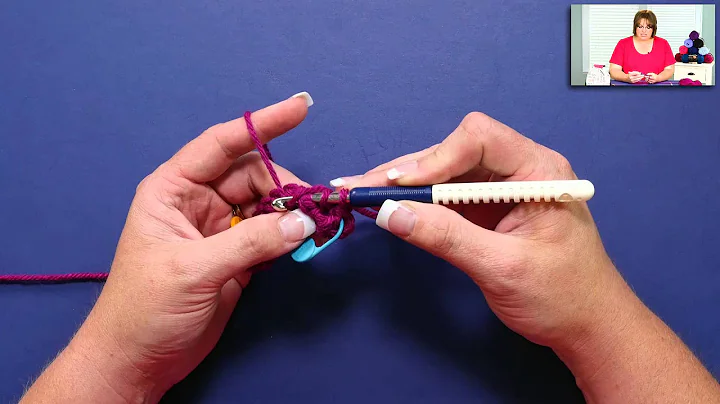
Learn to Crochet the Puffy Heart Stitch!
Table of Contents
- Introduction
- The Heart Stitch
- Materials needed
- Foundation double crochet
- Single crochets
- Creating the heart stitch
- Adding the white yarn
- Continuing the heart stitch pattern
- Completing the row
- Adding the Pink Yarn
- Chaining one and single crochets
- Skipping stitches and half double crochets
- Creating the heart shape
- Continuing the pattern
- Finishing the row
- Creating the Twisted Head Wrap
- Adding a white border
- Preparation for the head wrap
- Using the heart stitch for the valentine basket
- Upcoming projects
- Conclusion
The Heart Stitch: A Valentine's Day Crochet Tutorial
Valentine's Day is just around the corner, and what better way to celebrate than with a heart-themed crochet project? In this tutorial, I will teach you how to create the heart stitch, a beautiful and whimsical pattern that can be used in various projects. Whether you're looking to make a fun basket for Valentine's Day or add a unique touch to your accessories, the heart stitch is sure to impress.
Materials Needed
Before we dive into the tutorial, let's gather the materials you'll need to complete this project. Here's what you'll need:
- Yarn in two colors (I used pink and white)
- Crochet hook (size may vary depending on your yarn)
- Scissors
- Tapestry needle
Foundation Double Crochet
To begin our heart stitch pattern, we'll start with a foundation double crochet. This provides a stretchy and evenly balanced foundation for the rest of the stitch. If you're unfamiliar with the foundation double crochet technique, you can check out my video tutorial for a step-by-step guide.
Single Crochets
Once we have our foundation double crochet row, we'll move on to a row of single crochets. This will serve as the base for our heart stitches. Feel free to adjust the length of your row based on the desired size of your project. For this tutorial, I used a total of 66 stitches.
Creating the Heart Stitch
Now comes the fun part – creating the heart stitch! To do this, we'll introduce the white yarn into our work. Begin by pulling the white yarn through and tightening it to secure it in place. Then, chain up two to start the half of a cluster that forms the heart shape.
Each heart is made up of two clusters of three double crochets. The first cluster starts with the chain two and is completed by yarn over, going through the same loop, yarn over and going through two loops (leaving two on the hook), repeating the same process once more, and then yarn over and going through all three loops. This completes half of the cluster.
To create the other half, chain two and skip five stitches before starting the second cluster. Repeat the process of creating the three double crochets, making sure to keep your stitches tight. Continue this pattern of chaining two and creating clusters of three double crochets until the end of the row.
Adding the Pink Yarn
Once we've completed the heart stitch row, it's time to add the pink yarn back in. This will add contrast and make our heart stitches stand out even more. Begin by chaining one to secure the pink yarn and bring it up to the next level.
Next, single crochet into the first available stitch, tightening it as you go. Then, skip the next stitch and work half double crochets in the middle three stitches. To do this, yarn over, jump down to the stitch below, go through it, yarn over, and go through all three loops on the hook. Keep your stitches tight to maintain the overall shape of the heart.
Continue this pattern of chaining two, skipping a stitch, and working half double crochets until the end of the row. At the end, chain two and single crochet into the last stitch, creating a slight gap between the rows.
Creating the Twisted Head Wrap
Now that we've learned the heart stitch, let's explore potential projects. One idea is to turn our heart stitch swatch into a twisted head wrap. However, the swatch may need a little extra width, so we'll add a white border on both sides to achieve the desired size.
To make the twisted head wrap, follow my tutorial (linked in the top right corner of the screen) for detailed instructions. This accessory is a great way to showcase your heart stitch skills and add a touch of charm to your Valentine's Day outfit.
Using the Heart Stitch for the Valentine Basket
Another exciting project you can explore is a Valentine's Day-themed basket using the heart stitch. By incorporating brightly colored yarn scraps, you can create a vibrant and playful design. The heart stitch adds a lovely texture and enhances the overall aesthetic of the basket.
Upcoming Projects
If you enjoyed learning the heart stitch and are eager for more crochet projects, get ready for what's in store. I have two exciting videos coming up – a tutorial on creating a Tunisian slouchy beanie and a delightful project featuring the heart stitch. Be sure to subscribe and stay tuned for these upcoming videos. I guarantee you won't want to miss them!
Conclusion
In conclusion, the heart stitch is a versatile and charming pattern that can elevate your crochet projects. Whether you're looking to make a twisted head wrap, a Valentine's Day basket, or explore other creative ideas, the heart stitch is a fantastic technique to add to your repertoire. Have fun experimenting with colors and patterns, and let your creativity shine through in each stitch. Happy crocheting!
 WHY YOU SHOULD CHOOSE BEAUTYBADY


