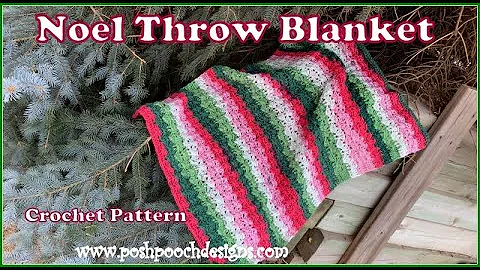
Learn to Crochet the Blossom Wrap with This Easy Tutorial
Table of Contents:
- Introduction
- Supplies needed
- Starting the wrap
3.1 Chain stitches
3.2 Row 1
3.3 Row 2
3.4 Row 3
3.5 Repeating rows 3 and 4
- Finishing the wrap
4.1 Final row
4.2 Adjusting size
- Conclusion
Introduction
Welcome to Through the Loop Yarn Craft! In this tutorial, we will be making the Blossom Wrap, a beautiful rectangular wrap perfect for the changing seasons. This wrap is made using worsted weight yarn, specifically Karen Cotton Cakes, which is a soft and easy-to-work-with cotton blend. Whether you're a beginner or an experienced crocheter, this wrap is a quick and enjoyable project. So let's gather our supplies and get started!
Supplies needed
Before we begin, let's make sure we have all the necessary supplies for this project. You will need:
- Worsted weight yarn (approximately 625 yards)
- K or 6.5mm crochet hook
- Yarn needle for weaving in ends
- Scissors
Starting the wrap
To start the wrap, we will be working width-wise, going in shorter rows with a lovely and airy stitch pattern called the Blossom Stitch. If you're new to this channel, don't forget to hit the like and subscribe button and check out our other patterns and stitch tutorials. You can also sign up for the Loop newsletter on our blog to stay up to date on everything new and enjoy exclusive deals and offers from Through the Loop Yarn Craft.
3.1 Chain stitches
Let's begin by creating a chain of 61 stitches. This chain will serve as the foundation for our wrap. However, feel free to adjust the length if you want a longer or shorter wrap.
3.2 Row 1
Now that we have our chain ready, we will start with row 1. Simply single crochet in the second chain from the hook, and continue single crocheting in each chain across. You should have a total of 60 single crochets.
3.3 Row 2
For row 2, chain 1 and turn your work. Skip the first stitch under the chain and work a V-stitch in the next stitch. A V-stitch consists of one double crochet, chain one, and another double crochet in the same stitch. After that, skip the next stitch and single crochet in the following stitch. Repeat this pattern, alternating between V-stitches and single crochets, until the end of the row.
3.4 Row 3
Moving on to row 3, chain 3 and turn your work. Start with a single crochet in the chain space of the V-stitch from the previous row. Then chain 1, do a double crochet in the single crochet from the row below, and chain 1 again. Repeat this pattern across the row.
3.5 Repeating rows 3 and 4
Row 3 marks the first of our two repeating rows. Simply continue repeating rows 3 and 4 until you've reached your desired length. Each repeat will consist of a single crochet in the chain space of the V-stitch, followed by a chain 1, double crochet in the single crochet, and another chain 1. End each row by double crocheting in the top of the turn chain from the row below.
4. Finishing the wrap
Once you've completed the desired number of repeats, it's time to finish off the wrap.
4.1 Final row
For the final row, chain 1 and turn your work. Single crochet in the first chain space, and single crochet in each stitch across the row. This will give you a total of 58 single crochets.
4.2 Adjusting size
If you want to adjust the size of your wrap, you can simply add more or fewer rows during the repeating pattern. This will allow you to customize the length and width to your preference.
Conclusion
Congratulations! You have successfully completed the Blossom Wrap. We hope you enjoyed making this beautiful and versatile accessory. Don't forget to check out the blog post linked below for the written pattern and detailed description of the materials used. If you found this tutorial helpful, please hit the like and subscribe button to show your support. Thank you for joining us, and happy crocheting!
Highlights:
- Learn how to make the Blossom Wrap, a rectangular wrap perfect for the changing seasons.
- Utilize Karen Cotton Cakes, a soft and easy-to-work-with cotton blend yarn.
- Follow along with the Blossom Stitch, an airy and beautiful stitch pattern.
- Adjust the size of your wrap according to your preference.
- Find more patterns and stitch tutorials on the Through the Loop Yarn Craft channel.
- Stay up to date with exclusive deals and offers by subscribing to the Loop newsletter.
FAQ:
Q: Can I use a different yarn for this project?
A: Yes, you can use any worsted weight yarn of your choice. Just make sure to check the gauge and adjust your hook size accordingly.
Q: How long does it take to complete the Blossom Wrap?
A: The wrap works up quickly and can be completed in a few days depending on your crocheting speed and the amount of time you dedicate to the project.
Q: Can I make the Blossom Wrap wider?
A: Absolutely! Simply add more stitches to your starting chain, keeping in mind that it may require additional yarn.
Q: Is this pattern suitable for beginners?
A: Yes, this pattern is beginner-friendly and includes step-by-step instructions to guide you through each row and stitch.
Q: Can I sell the finished wrap?
A: Yes, you can sell the finished wrap. Just make sure to credit the pattern to Through the Loop Yarn Craft.
Q: Are there other stitch patterns I can use for this wrap?
A: While the Blossom Stitch creates a beautiful texture, feel free to experiment with other stitch patterns to personalize your wrap.
 WHY YOU SHOULD CHOOSE BEAUTYBADY


