Learn to Crochet Mini Bowls
Table of Contents
- Introduction
- Materials Needed
- Step 1: Making a Slip Knot
- Step 2: Working in the Round
- Step 3: Round 1 - Single Crochet
- Step 4: Round 2 - Single Crochet Increase
- Step 5: Round 3 - Single Crochet Increase and Single Crochet
- Step 6: Rounds 4 and Onwards - Single Crochet
- Creating the Dome Shape
- Finishing Touches
- Conclusion
- Frequently Asked Questions (FAQ)
How to Make a Small Crocheted Basket: A Step-by-Step Tutorial
Crocheting is a popular craft that allows you to create beautiful and functional items using yarn and a crochet hook. One project that is both practical and cute is making a small crocheted basket. In this step-by-step tutorial, we will guide you through the process of creating your very own crocheted basket.
Introduction
Crocheted baskets can be used to hold small items, such as keys or accessories, or even as decorative pieces. They are quick and easy to make, making them a perfect project for both beginners and experienced crocheters.
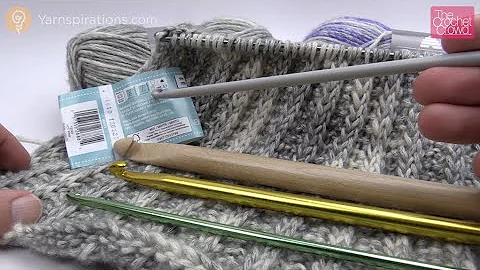
Materials Needed
To make a small crocheted basket, you will need the following materials:
- Yarn (preferably Red Heart Super Saver yarn)
- Crochet hook (preferably a 5mm hook)
- Scissors
Now that you have gathered all the necessary materials, let's get started!
Step 1: Making a Slip Knot
Before we begin crocheting, we need to create a slip knot. This will serve as the starting point for our crocheted basket. To make a slip knot, follow these steps:
- Take the end of your yarn and create a loop.
- Insert your crochet hook through the loop.
- Pull the end of the loop to tighten the knot around your crochet hook.
Step 2: Working in the Round
To create our crocheted basket, we will be working in the round. This means that instead of creating rows, we will be forming a continuous spiral. This technique is commonly used in amigurumi projects, which involve creating small stuffed animals or toys.
To start working in the round, follow these steps:
- Chain three stitches. This will serve as the first stitch of our project.
- Slip stitch into the first chain to create a ring.
Step 3: Round 1 - Single Crochet
For round one, we will be working single crochets into the ring we created in the previous step. Single crochet is one of the most basic stitches in crochet and forms the foundation of our crocheted basket.
To complete round one, follow these steps:
- Chain one to serve as the turning chain.
- Work six single crochets into the ring.
- Slip stitch into the first single crochet to join the round.
Step 4: Round 2 - Single Crochet Increase
In round two, we will be increasing the number of stitches to create a wider base for our crocheted basket. This will help give it a rounded shape.
To complete round two, follow these steps:
- Chain one to serve as the turning chain.
- Work two single crochets into each stitch from round one.
- Slip stitch into the first single crochet to join the round.
Step 5: Round 3 - Single Crochet Increase and Single Crochet
In round three, we will continue to increase the number of stitches, but at a reduced rate compared to round two. This will help create a gradual curve in the sides of our crocheted basket.
To complete round three, follow these steps:
- Chain one to serve as the turning chain.
- Work one single crochet increase in the first stitch from round two (two single crochets in the same stitch).
- Work one single crochet in each of the next two stitches from round two.
- Repeat steps 2 and 3 three more times.
- Slip stitch into the first single crochet to join the round.
Step 6: Rounds 4 and Onwards - Single Crochet
From round four onwards, we will be working evenly without any increases. This will create the straight sides of our crocheted basket.
To complete each subsequent round, follow these steps:
- Chain one to serve as the turning chain.
- Work one single crochet in each stitch from the previous round.
- Slip stitch into the first single crochet to join the round.
Creating the Dome Shape
As you continue working rounds without any increases, you will notice that the sides of your crocheted basket start to straighten out and become more vertical. To create a dome shape, it's important to gradually decrease the number of increases. This will allow the sides to curve upwards.
Continue working rounds in the same manner as in Step 6, but consider decreasing the number of increases in each subsequent round. Experiment with different heights and widths to achieve the desired shape for your crocheted basket.
Finishing Touches
Once you have reached the desired height for your crocheted basket, you can finish it off by cutting the yarn, leaving a tail, and pulling it through the last stitch to secure it. Weave in any loose ends to give your basket a polished look.
You can also add additional embellishments, such as handles or decorative stitches, to personalize your crocheted basket even further.
Conclusion
Congratulations! You have successfully completed your own small crocheted basket. This versatile project can be used for organizing small items or as a decorative piece in your home. Don't be afraid to experiment with different yarn colors and stitch patterns to create unique variations of this crocheted basket.
If you enjoyed this tutorial, we encourage you to explore other crocheting projects and expand your skills further. Crocheting is a rewarding and relaxing hobby that offers endless possibilities for creativity.
Frequently Asked Questions (FAQ)
Q: What type of yarn should I use for my crocheted basket?
A: We recommend using Red Heart Super Saver yarn or any similar medium-weight yarn for this project. However, feel free to use any yarn that suits your preference. Just make sure to adjust the hook size accordingly.
Q: Can I make a larger version of this crocheted basket?
A: Absolutely! This tutorial provides a basic pattern for a small crocheted basket. To make a larger version, simply increase the number of stitches and rounds accordingly. You can experiment with different sizes to create baskets of various dimensions.
Q: Are there any advanced techniques or stitches involved in this project?
A: This tutorial primarily focuses on basic crochet stitches, making it suitable for beginners. However, if you are already familiar with more advanced crocheting techniques, feel free to incorporate them into your project to add more complexity and uniqueness.
Q: How long does it typically take to complete a crocheted basket?
A: The time it takes to complete a crocheted basket can vary depending on your crochet speed and the size of the basket. Generally, this project can be completed within a few hours or over the course of a few days.
Q: Can I sell the crocheted baskets I make using this tutorial?
A: Yes, you can sell the crocheted baskets you make using this tutorial. However, please be mindful of any copyright restrictions on the original pattern and give credit where it is due.
Q: Is this project suitable for children or beginners?
A: Yes, this project is suitable for beginners and can be a great introduction to crocheting. However, adult supervision may be required for young children due to the use of sharp crochet hooks and scissors.
Remember, practice makes perfect, so don't get discouraged if your first attempt doesn't turn out exactly as you envisioned. With time and experience, your crocheting skills will continue to improve, allowing you to create even more intricate and beautiful projects. Happy crocheting!


 WHY YOU SHOULD CHOOSE BEAUTYBADY