Learn to crochet a stunning rug!
Table of Contents:
- Introduction
- Getting Started with Crocheting a Circle
2.1. Making the Magic Ring
2.2. Creating the First Round
2.3. Changing Colors
- Increasing the Size of the Circle
3.1. Adding Rounds with Increases
3.2. Dealing with Rippling
- Finishing the Circle
4.1. Reaching the Desired Size
4.2. Creating the Petal Shape
4.3. Blocking and Shaping the Rug
- Conclusion
Crocheting a Circle: A Step-by-Step Guide
Crocheting is a popular and enjoyable craft that allows you to create beautiful and unique items using yarn and a crochet hook. One of the basic shapes that you can crochet is a circle, and in this article, we will guide you through the process of crocheting a circle from start to finish. Whether you're a beginner or an experienced crocheter, this step-by-step guide will help you create a perfect circle every time.
1. Introduction
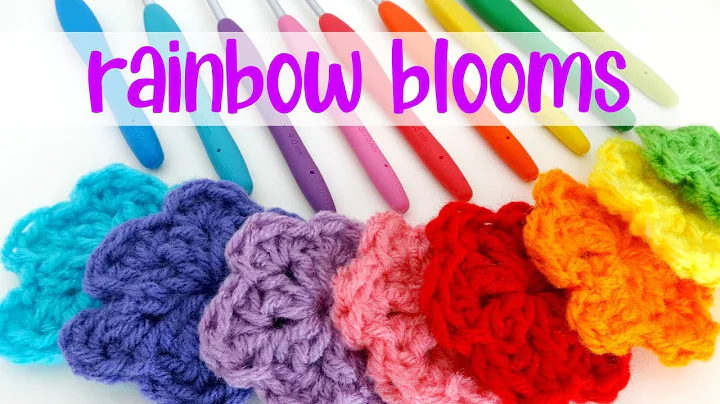
Crocheting circles can be a versatile and fun project, as they can be used to make a variety of items such as rugs, coasters, placemats, and more. In this article, we will focus on creating a circle rug using basic crochet stitches.
2. Getting Started with Crocheting a Circle
Before you begin crocheting your circle, it's important to gather the necessary materials and understand a few basic techniques. Here are the steps to get started:
2.1. Making the Magic Ring
The magic ring is commonly used as a starting point for crocheting circles. To make the magic ring, hold the end of the yarn in your hand and wrap it around your fingers twice. Insert the crochet hook through the ring and pull the yarn through to create a loop. Then, chain two to secure the ring.
2.2. Creating the First Round
In the first round of crocheting, you will need to work multiple half double crochet stitches into the magic ring. Insert the hook into the ring, yarn over, and pull up a loop. Yarn over again and pull through all three loops on the hook. Repeat this process to create a total of twelve stitches in the magic ring.
2.3. Changing Colors
If you want to introduce a new color to your circle, you can switch colors at the end of a round. To do this, finish the last half double crochet of the round with the new color. Cut the old color yarn, leaving a tail to be woven in later. Then, slip stitch with the new color to mark the beginning of the next round.
3. Increasing the Size of the Circle
To make your circle larger, you will need to increase the number of stitches in each round. Here's how you can achieve that:
3.1. Adding Rounds with Increases
In each round, you will need to work two half double crochet stitches into some stitches to create an increase. The exact pattern will depend on the desired size of your circle. For example, in one round, you can work two half double crochet stitches followed by one half double crochet stitch, repeating this pattern until the end of the round.
3.2. Dealing with Rippling
As you increase the size of your circle, you may encounter rippling or curling. This can be remedied by occasionally doing a round without any increases. This will help flatten the circle and prevent it from forming a wall or curling inward. Ensure that you smooth out any rippling by gently stretching and shaping the edges.
4. Finishing the Circle
Once you have reached the desired size for your circle, it's time to finish it off and add the final touches. Here's what you need to do:
4.1. Reaching the Desired Size
Continue adding rounds with increases until you reach your desired size. Remember to switch colors if desired and leave long enough tails to weave in later. You can refer to the written instructions provided on our blog for the precise number of stitches per round.
4.2. Creating the Petal Shape
To make your circle resemble a petal shape, you can add a decorative border to the edge. This can be achieved by doing a combination of stitches such as double crochets, treble crochets, half double crochets, and single crochets in specific stitches.
4.3. Blocking and Shaping the Rug
To ensure that your circle rug lays flat and retains its shape, it's recommended to block it. This can be done by wetting the rug, massaging it, and pinning it into shape. Leave it to dry overnight, and you will have a perfectly shaped circle rug.
5. Conclusion
Crocheting circles can be a rewarding project that allows you to create beautiful and functional items. By following the step-by-step guide provided in this article, you will be able to crochet a circle with ease. Whether you're a beginner or an experienced crocheter, grab your supplies and start creating your own circle masterpiece.
Highlights:
- Learn how to crochet a perfect circle using basic crochet stitches.
- Discover techniques for increasing the size of your circle and dealing with rippling or curling.
- Finish off your circle with decorative borders and learn how to block and shape your rug for a professional-looking result.
- Create beautiful and functional items such as rugs, coasters, and placemats using the skills you learn.
FAQ:
Q: Can I use different types of yarn for crocheting circles?
A: Yes, you can use various types of yarn depending on the desired texture and appearance of your project. Experimenting with different yarn weights and materials can create unique and interesting effects.
Q: How can I modify the petal shape for my circle rug?
A: The decorative border can be customized according to your preference. You can play around with different stitch combinations or add additional rounds to achieve the desired shape and size.
Q: Can I use this technique to crochet other shapes?
A: While this article focuses on crocheting circles, the techniques and stitches discussed can be applied to crocheting other shapes as well. With a bit of creativity and imagination, you can create various shapes using similar principles.


 WHY YOU SHOULD CHOOSE BEAUTYBADY