Learn to Crochet a Beautiful Scalloped Border
Table of Contents:
- Introduction
- Materials Needed
- Creating a Single Crochet Border
- Adding a Scalloped Border
- Adjusting the Scallop Placement
- Finishing Touches
- Tips and Tricks
- Troubleshooting
- Conclusion
How to Add a Scalloped Border to Your Crochet Projects
Are you looking to add a little extra flair to your crochet projects? One way to do that is by adding a scalloped border. It's a simple yet beautiful technique that can turn an ordinary piece into something extraordinary. In this article, we will guide you step-by-step on how to create a scalloped border for your crochet projects.
Introduction
Crocheting is a popular craft that allows you to create beautiful and functional items. Adding a border to your crochet project can give it a more finished look and enhance its overall appearance. One option for a border is a scalloped design, which creates a delightful wave-like pattern around the edge.
Materials Needed
Before you begin, gather the following materials:
- Yarn of your choice
- Corresponding crochet hook size
- Scissors
- Yarn needle
Make sure to choose a yarn color that complements your project. You can either use the same color as your project or opt for a contrasting color to make the scallops stand out.
Creating a Single Crochet Border
The first step in creating the scalloped border is to create a single crochet around your entire piece. If you have a blanket or a scarf, you would do the single crochet around the entire project. For this tutorial, we will demonstrate doing the border around the entire project.
To begin, attach another piece of yarn to your project. You can either use the same color or a different color for better visibility. Create a slipknot and insert your hook into a stitch at the top of your project. Pull the loop through and bring it up, creating another loop.
Next, go through each stitch and do a single crochet. Insert your hook, pull up a loop, and pull through two. Repeat this process all the way around until you reach the end of the row. In the corners of your project, do three single crochets in the same corner to smoothly navigate the turn.
When you reach the sides of your project, where the ends of the rows are, insert your hook wherever there is space. Try to maintain a similar spacing as at the top. Take the time to assess the spacing and adjust as needed to avoid gaps or bunching.
Continue with the single crochets until you reach the starting point of your border. Do another single crochet in that stitch and finish with a slip stitch. Insert your hook under the white yarn where you created the border, yarn over, and pull through the front loop only. This slip stitch secures the border and prepares you for the scalloped border.
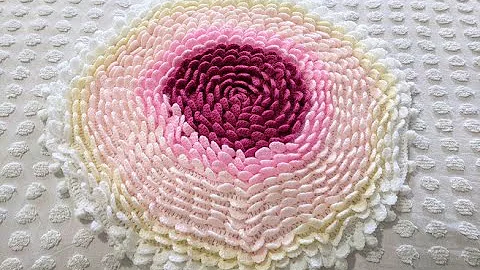
Adding a Scalloped Border
To achieve the scalloped border, you will be working in clusters of double crochets. Yarn over and insert your hook into the next stitch from the border. Yarn over again, pull through, yarn over, and pull through two. Repeat this process four more times, working five double crochets in total.
Once you have completed the cluster, skip the next stitch and do a slip stitch in the following stitch. This slip stitch will connect the cluster to the next one and create the scalloped shape. Continue this pattern all around your project until you reach the starting point.
Adjusting the Scallop Placement
Depending on your preference and the desired look, you can make adjustments to the placement of the scallops. At the corners of your project, you have the option to skip one stitch before doing the slip stitch and starting the double crochet cluster. This will space out the scallops more evenly.
Feel free to experiment with the placement of the scallops to achieve the desired effect. You can skip two stitches instead of one to further space out the scallops. Find a layout that suits your project best and enhances its overall appearance.
Finishing Touches
Once you have completed the scalloped border, it's time to finish off your project. Cut the yarn, leaving a tail. To sew in the ends, insert your hook from the back and pull the tail through to the back. This will ensure that the tail is hidden when the project is complete.
Make sure to sew in the ends neatly, especially if you used a different color for the border. You want the ends to blend seamlessly with the project. Refer to a tutorial on how to sew in ends for more detailed instructions.
Tips and Tricks
- Choose yarn colors that complement each other for a visually appealing result.
- Practice the single crochet and double crochet stitches before attempting the border.
- When working on the sides of your project, take the time to assess the spacing and adjust as needed.
- Experiment with the placement of the scallops to achieve different effects.
- Sew in the ends neatly to create a polished finish.
Troubleshooting
- If your scallops look too stretched out, consider skipping two stitches before doing the slip stitch to space them out more evenly.
- If your scallops look too bunched up, skip fewer stitches or adjust the tightness of your double crochets.
- If you encounter any difficulties during the process, review the tutorials linked in this article or seek additional guidance from crochet resources.
Conclusion
Adding a scalloped border to your crochet projects is a fantastic way to elevate their appearance. By following the step-by-step instructions in this article, you can easily create a beautiful scalloped border that will impress your friends and family. Let your creativity shine and enjoy the process of transforming your crochet projects into stunning masterpieces.
 Beauty


 WHY YOU SHOULD CHOOSE BEAUTYBADY