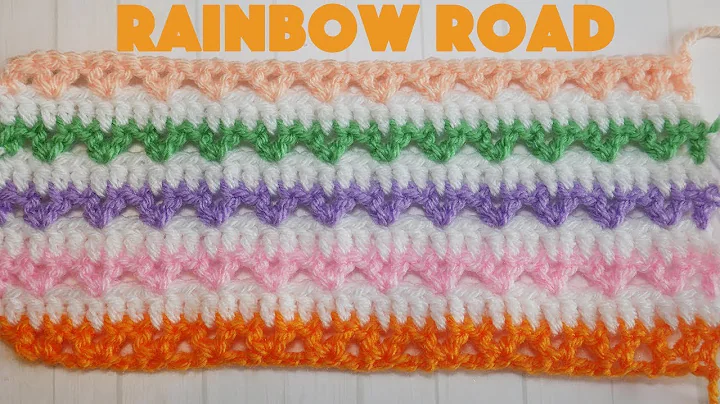
Learn the Multicolor Bean Stitch: Fast and Easy Crochet
Table of Contents:
- Introduction
- Understanding the Reversible Stitch
- Materials Required
- Step-by-Step Instructions
4.1. Abbreviations Used
4.2. Starting the Stitch
4.3. Creating the Rows
4.4. Switching Colors
4.5. Completing the Stitch
- Variation of the Stitch: Bean Stitch
- Benefits of Using the Reversible Stitch
- Ideas for Using the Reversible Stitch
- Tips and Tricks
- Frequently Asked Questions
- Conclusion
Reversible Crochet Stitch: A Step-by-Step Guide
Introduction
Are you looking to add an element of versatility to your crochet projects? The reversible stitch is just what you need! In this step-by-step guide, we will show you how to create this beautiful and functional stitch that can be used for a variety of projects, especially baby blankets. With its thick and puffy texture, the reversible stitch is perfect for keeping your little ones warm and cozy. So, grab your crochet hook and let's get started!
Understanding the Reversible Stitch
The reversible stitch is a variation of the Spanish bean stitch and is known for its unique texture and reversible nature. While it appears slightly looser than the traditional bean stitch, it is thicker and perfect for baby blankets. By using a smaller hook and following our instructions, you can achieve the desired look with ease.
Materials Required
Before we begin, let's gather the materials you will need for this project:
- Crochet hook (4.5mm)
- Worsted weight yarn (color of your choice)
- Scissors
- Tapestry needle
Step-by-Step Instructions
4.1 Abbreviations Used
To help you follow along, here are the abbreviations we will be using throughout the tutorial:
- ch: chain
- yo: yarn over
- st: stitch
- sl st: slip stitch
4.2 Starting the Stitch
To start the reversible stitch, create a foundation chain with a multiple of 2 plus 1. For example, if you want to create a sample piece, you can chain 21 stitches. This will allow us to demonstrate the stitch pattern effectively.
4.3 Creating the Rows
Row 1: Insert your hook into the third chain from the hook, and pull up a loop. YO, insert your hook into the same chain, and pull up another loop. Repeat from to until you have 6 loops on your hook. Yarn over and pull through all 6 loops, then chain 1 to close the stitch. This creates a bean stitch.
Row 2: Skip one chain and insert your hook into the next chain. Repeat the process of creating a bean stitch, as explained in Row 1. Continue this pattern until you reach the end of the row.
4.4 Switching Colors
If you wish to add a pop of color or switch between colors, follow these instructions:
- Leave the side where you started your stitches untouched and come back to the beginning.
- Insert your hook into the space between the stitches and introduce the new color.
- Chain 2 and immediately create a bean stitch in that space.
4.5 Completing the Stitch
Continue creating rows of bean stitches, following the same pattern as explained in Rows 1 and 2. Make sure to maintain the required number of stitches in each row to ensure the edges do not ripple. If done correctly, you will have a thick, reversible stitch that is perfect for baby blankets and other cozy projects.
Variation of the Stitch: Bean Stitch
The reversible stitch is a variation of the bean stitch, which is equally versatile and can be used for a range of projects. If you are interested in learning how to create the bean stitch, let us know in the comments below.
Benefits of Using the Reversible Stitch
The reversible stitch offers several advantages that make it a popular choice among crocheters:
- Versatility: The reversible nature of the stitch allows you to create two attractive sides, providing greater flexibility in design.
- Texture: The stitch's puffy and thick texture adds warmth and softness to your projects, making it especially suitable for baby blankets.
- Ease of Execution: Once you understand the stitch pattern, it becomes relatively easy to execute, even for beginners.
Ideas for Using the Reversible Stitch
The reversible stitch can be used in various projects, including:
- Baby blankets
- Scarves and shawls
- Cushions and pillows
- Coasters and table runners
- Bags and purses
Tips and Tricks
- Count your stitches carefully to ensure the edges remain even and do not ripple.
- Experiment with different colors to create unique patterns and visual effects.
- Practice the stitch on a small swatch before starting your main project to familiarize yourself with the pattern.
Frequently Asked Questions
Q: Can I use a different yarn weight for this stitch?
A: While the reversible stitch works best with worsted weight yarn, you can experiment with different yarn weights to achieve varying textures and densities.
Q: How long does it take to learn this stitch?
A: With practice, most crocheters can pick up the reversible stitch within a few tries. Take your time and don't get discouraged if it takes a little while to perfect.
Q: Can I make modifications to the stitch pattern?
A: Absolutely! Feel free to add your own creative touch by modifying the stitch pattern. Explore different stitch combinations and color combinations to make your projects even more unique.
Conclusion
The reversible stitch is a fantastic addition to any crocheter's repertoire. Its versatility, thick texture, and reversible nature make it perfect for a wide range of projects, particularly baby blankets. With our step-by-step instructions and helpful tips, you'll be creating beautiful reversible stitches in no time. So grab your yarn and hook, and let your creativity flow! Happy crocheting!
 WHY YOU SHOULD CHOOSE BEAUTYBADY


