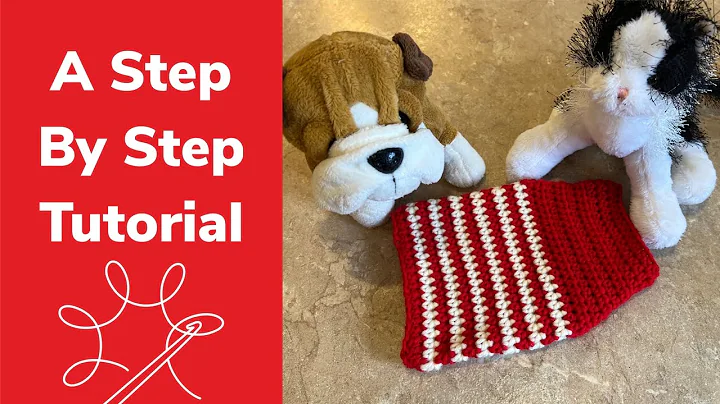
Learn How to Crochet Leg Warmers with Easy Tutorial
Table of Contents
- Introduction
- Choosing the Materials
- Creating the Ribbed Cuff
- Working the Leg Warmers Side to Side
- Making the Chain for the Leg Warmers
- Single Crocheting Across the Chain
- Half Double Crocheting in the Middle
- Working the Singles and Half Doubles
- Changing Stitches and Adding Stitch Markers
- Repeating the Pattern for Desired Width
- Finishing Off and Joining the Ends
Easy Crochet Leg Warmers: Stay Warm and Stylish
Are you looking for a fun and easy crochet project to keep your legs warm and add a touch of style to your outfits? Look no further! In this article, we will guide you through the process of creating your own leg warmers using simple crochet stitches. Whether you're a beginner or an experienced crocheter, this pattern is perfect for you. So grab your crochet hooks and let's get started!
1. Introduction
Leg warmers are not only a fashionable accessory but also a practical way to keep your legs cozy during cold weather. With this easy crochet pattern, you can make leg warmers in a range of colors to match every outfit. You can even alternate colors to create a striped version for a unique look. This pattern is beginner-friendly and uses basic crochet stitches, making it a great project for those new to crochet.
2. Choosing the Materials
Before we dive into the crochet pattern, let's talk about the materials you'll need. For this project, you'll need a 4mm crochet hook and 8-ply yarn of your choice. The yarn and hook size can be adjusted based on your preference. Additionally, you may want to have a stitch marker and elastic on hand for optional finishing touches.
3. Creating the Ribbed Cuff
We'll start our leg warmers by creating a ribbed cuff. To determine the number of stitches for your cuff, consider the width of your leg and the desired fit. You can choose any number of stitches, but for this tutorial, we'll use 10 stitches across. It's important to note that the same number of stitches should be repeated on both ends.
4. Working the Leg Warmers Side to Side
In this pattern, we'll be working the leg warmers side to side. This means that we'll start at the top and crochet down to the bottom. To begin, make a chain that is as long as you want your leg warmers to be. Keep in mind that the leg warmers will scrunch down a bit, so you may want to add a bit more length or use elastic to prevent them from falling down.
5. Making the Chain for the Leg Warmers
Now that you have determined the desired length, make a chain of that length. This will serve as the foundation for your leg warmers. Take your time to create a neat and even chain, ensuring that it matches the height you want for your leg warmers.
6. Single Crocheting Across the Chain
Once you have your chain, it's time to start crocheting your leg warmers. We'll begin with the single crochet stitch. Insert your hook into the second chain from the hook (excluding the chain on the hook itself). Yarn over and pull through two loops on the hook. Repeat this process across the chain, creating single crochet stitches. The number of stitches will depend on the width of your leg warmers, so make sure to follow your chosen number.
7. Half Double Crocheting in the Middle
In the middle section of your leg warmers, we'll be using the half double crochet stitch. This stitch provides a different texture and can add some stretch to the fabric. Again, the number of stitches will depend on the width of your leg warmers. Feel free to experiment with different stitch combinations to achieve your desired look.
8. Working the Singles and Half Doubles
As you continue crocheting, you'll alternate between single crochet stitches and half double crochet stitches. This creates the ribbed pattern and adds visual interest to the leg warmers. It's important to pay attention to the stitch markers placed at the stitch change points. This will help you maintain the pattern and ensure a symmetrical design.
9. Changing Stitches and Adding Stitch Markers
When you reach the stitch markers, it's time to change stitches. As mentioned earlier, the single crochet stitches should be worked into the single crochet stitches, while the half double crochet stitches should be worked into the half double crochet stitches. This stitch change adds dimension to the leg warmers and keeps the pattern consistent.
10. Repeating the Pattern for Desired Width
To achieve the desired width for your leg warmers, repeat the pattern of alternating single crochet and half double crochet stitches. Continue working in the side-to-side direction until the leg warmers are wide enough to fit around your legs comfortably. Feel free to make adjustments as needed to ensure the perfect fit.
11. Finishing Off and Joining the Ends
Once you've reached the desired width, it's time to finish off your leg warmers. Cut a piece of yarn that is approximately 30 to 40 centimeters long. Fold the leg warmer in half so that the neat edge aligns with the starting edge. Use a yarn needle to whip stitch the ends together, securing the leg warmer into a loop. Make sure to weave in any loose ends for a professional finish.
Congratulations! You've successfully crocheted your own pair of leg warmers. Feel free to experiment with different colors, stitch combinations, and embellishments to make each pair uniquely yours. Stay warm and stylish all winter long!
 WHY YOU SHOULD CHOOSE BEAUTYBADY


