Learn How to Crochet Adorable Cat Ears!
Table of Contents:
- Introduction
1.1. Purpose of the Article
- Materials Needed
2.1. Yarn
2.2. Crochet Hook
2.3. Wire Pet Brush
2.4. Scissors
2.5. Yarn Needle
2.6. Bobby Pins
- Making the Outside Part of the Ear
3.1. Crocheting the Base
3.2. Decreasing the Stitches
3.3. Repeating the Process
- Making the Inside Part of the Ear
4.1. Crocheting the Base
4.2. Decreasing the Stitches
4.3. Finishing the Ear
- Sewing the Ears Together
5.1. Attaching the Inside Part to the Outside Part
5.2. Fastening Off and Hiding the Strings
- Making the Ears Fuzzy
6.1. Using a Wire Brush or Pet Brush
6.2. Brushing the Ears
- Adding Ribbon (Optional)
- Attaching the Ears to the Head
8.1. Using Bobby Pins
8.2. Securing the Ears
- Customization Options
- Conclusion
How to Make Crochet Cat Ears
Introduction:
Cat ears are a popular fashion accessory that can be easily crafted using crochet techniques. In this article, we will guide you through the step-by-step process of making your own crochet cat ears. Whether you're attending a costume party or simply want to add a touch of whimsy to your outfit, these cat ears are fun and easy to create. So, gather your materials and let's get started!
Materials Needed:
To make crochet cat ears, you will need the following materials:
- Yarn - Choose black and pink yarn, or any colors of your preference.
- Crochet Hook - Select a hook size appropriate for the yarn you are using.
- Wire Pet Brush - This will be used to create the fuzzy texture on the ears.
- Scissors - For cutting yarn and trimming the finished ears.
- Yarn Needle - Used for sewing and fastening off.
- Bobby Pins - These will be used to attach the cat ears to your head.
Making the Outside Part of the Ear:
To begin creating the cat ears, follow these steps:
-
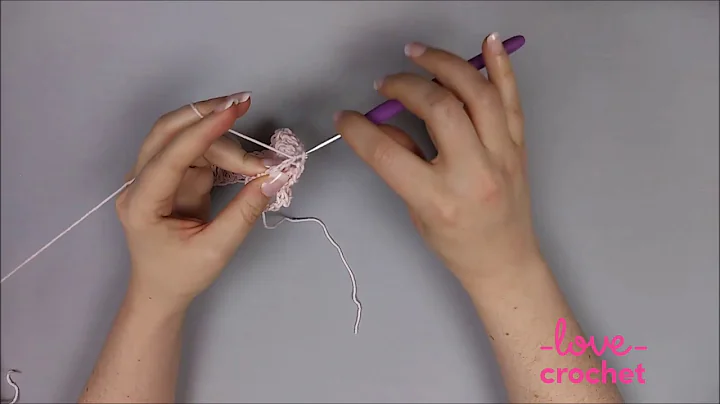
Crocheting the Base: Using the black yarn, start by chaining 28 stitches. Skip the first two chains and single crochet into the third stitch. Continue single crocheting until the end of the row.
Tip: You can adjust the size of the ears by making more or fewer chains at the beginning.
-
Decreasing the Stitches: Chain one and turn. Single crochet two together by inserting the hook through the next stitch, yarn over, pull through, then insert the hook through the following stitch, yarn over, and pull through. Yarn over and pull through all three loops on the hook. Continue single crocheting until the last two stitches. Single crochet two together again to decrease the stitches.
-
Repeating the Process: Chain one and start the next row. Repeat the process of single crocheting and decreasing the stitches until you reach the desired size for the outside part of the ear. Fasten off to finish.
Making the Inside Part of the Ear:
Next, create the inside part of the ear using the pink yarn. Follow these steps:
-
Crocheting the Base: Chain 27 stitches, which is one less than the outside part. Skip two stitches and single crochet into the third stitch. Single crochet across the row.
-
Decreasing the Stitches: Chain one and turn. Single crochet two together by inserting the hook through the next stitch, yarn over, pull through, then insert the hook through the following stitch, yarn over, and pull through. Yarn over and pull through all three loops on the hook. Continue single crocheting until the last two stitches. Single crochet two together to decrease the stitches.
-
Finishing the Ear: Repeat the process of single crocheting and decreasing the stitches until you reach the top of the ear. For the last row, skip the first stitch and single crochet two together. Chain one and fasten off.
Sewing the Ears Together:
To assemble the cat ears, follow these steps:
-
Attaching the Inside Part to the Outside Part: Using a yarn needle, sew the inside part of the ear onto the outside part. Make sure the stitches are only visible on the front side of the ear. Sew all around the ear, paying extra attention to the corners for a secure hold.
-
Fastening Off and Hiding the Strings: Cut the excess string and pull it through to hide it inside the pink part of the ear. Repeat this step for both sides of the ear to ensure a finished look.
Making the Ears Fuzzy:
To give the cat ears a fuzzy appearance, use a wire brush or pet brush. Follow these instructions:
-
Using a Wire Brush or Pet Brush: Take your wire brush or pet brush and gently brush the surface of the ears. Be thorough, reaching every crease and edge to achieve a fuzzy texture.
-
Brushing the Ears: Continue brushing until you are satisfied with the level of fuzziness. This step may take some time, but it's crucial for achieving the desired effect.
Adding Ribbon (Optional):
If you prefer, you can enhance the look of your cat ears by adding ribbon. Here's how:
-
Attach the Ribbon: Cut a long piece of ribbon and tie a slip knot. Insert your crochet hook through the closed end of the ear and place the slip knot over it. Fasten off with the longer string.
-
Tie the Ear Together: Use the longer string to tie the ear together, securing the ribbon in place. Utilize the yarn needle to sew the ribbon onto the black part of the ear, avoiding the pink part. Make sure to double-check the placement as you go along.
Attaching the Ears to the Head:
To wear your homemade cat ears, use bobby pins to secure them. Follow these steps:
-
Using Bobby Pins: Adjust the position of the cat ears on your head to your liking. Insert the smooth side of the bobby pins through the ear to attach them. Place three bobby pins on each side, two in the front and one at the back, for a secure hold.
-
Securing the Ears: Once the ears are attached, use the bobby pins to secure them in place. Line up the position of the ears as accurately as possible.
Customization Options:
Feel free to explore customization options for your cat ears. You can experiment with different colors, add accessories like bows or flowers, or alter the size of the ears. Get creative and make the cat ears uniquely yours.
Conclusion:
Congratulations on creating your own crochet cat ears! With just a few materials and some simple crochet techniques, you can make a stylish and fun accessory. Remember to customize your cat ears to suit your personal taste. Enjoy wearing your cat ears and have a fantastic time at your next costume event or playful day out.
 WHY YOU SHOULD CHOOSE BEAUTYBADY


