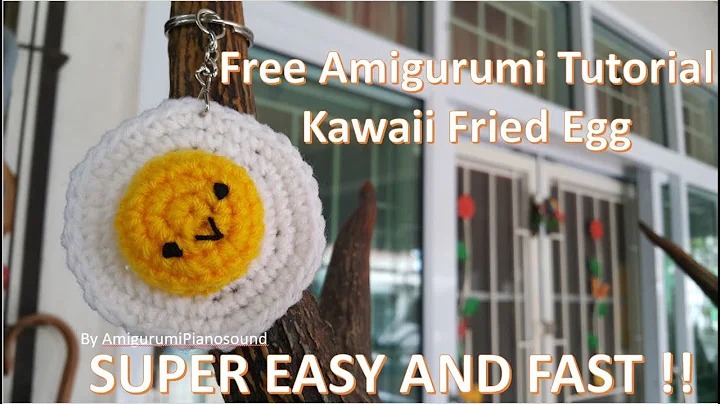
Handmade Crochet Creations: Keychains, Bag Hangers, Mushroom Lip Balm Holders
Table of Contents
- Introduction
- Tools and Materials
- Step 1: Making the Magic Ring
- Step 2: First Round
- Step 3: Second Round
- Step 4: Third Round
- Step 5: Fourth Round
- Step 6: Fifth Round
- Step 7: Sixth Round
- Step 8: Seventh Round
- Step 9: Eighth Round
- Step 10: Ninth Round
- Adding Decorations
- Attaching Buttons
- Conclusion
Article
Introduction
Welcome back, everyone! In this tutorial, we will be making a lip balm holder that can also be used as a bag chain or key chain. It's a fun and practical project that you can customize to your liking. So let's get started!
Tools and Materials
Before we begin, let's gather all the tools and materials we'll need for this project. Make sure you have the following:
- Crochet hook
- Yarn
- Scissors
- Glue gun (optional)
- Buttons (optional)
- Beads or other decorations (optional)
You can find the links to purchase these items in the video description.
Step 1: Making the Magic Ring
To start, we will create a magic ring. Form a ring with your yarn and insert your crochet hook through the center. Pull the yarn through the ring and create 12 single crochets inside the ring. Once finished, pull the end thread to close the hole and slip stitch in the first single crochet.
Step 2: First Round
For the first round, make one chain stitch and start in the same hole as the slip stitch. Make an increase in the following hole. The pattern for this round is to fill each hole with an increase. By the end of this round, you should have 24 single crochets. Slip stitch in the first single crochet hole.
Step 3: Second Round
For the second round, make one chain stitch and start in the same hole as the slip stitch. Make one single crochet in the next hole, then an increase in the following hole. Repeat this pattern of one single crochet and one increase around the circle. By the end of this round, you should have 36 single crochets. Slip stitch in the first single crochet hole.
Step 4: Third Round
Continue the pattern for the third round. Make one chain stitch and start in the same hole as the slip stitch. Make one single crochet in each hole around the circle. By the end of this round, you should still have 36 single crochets. Slip stitch in the first single crochet hole.
Step 5: Fourth Round
Repeat the same pattern for the fourth round. Make one chain stitch and start in the same hole as the slip stitch. Make one single crochet, then an increase in the following hole. Repeat this pattern around the circle. By the end of this round, you should have 24 single crochets. Slip stitch in the first single crochet hole.
Step 6: Fifth Round
For the fifth round, make one chain stitch and start in the same hole as the slip stitch. Make one single crochet in each hole around the circle. By the end of this round, you should still have 24 single crochets. Slip stitch in the first single crochet hole.
Step 7: Sixth Round to Twelfth Round
For the next six rounds, continue filling each hole with one single crochet. By the end of the twelfth round, you should have 36 single crochets.
Step 13: Adding Decorations
Now it's time to add some decorations to your lip balm holder. You can choose to attach beads or other embellishments using a glue gun or sewing needle. Get creative and make it uniquely yours!
Step 14: Attaching Buttons
To make your lip balm holder even more functional, you can attach buttons. Use a glue gun or sewing needle to secure the buttons onto the holder. The number and size of the buttons are up to you.
Conclusion
Congratulations, you have successfully created your own lip balm holder! This versatile accessory can not only keep your lip balm handy but also add a touch of style to your bag or keys. Feel free to experiment with different yarn colors and decorations to make it your own. We hope you enjoyed this tutorial and found it useful. Thank you for watching, and we'll see you in the next video tutorial.
Highlights
- Learn how to make a lip balm holder that can also be used as a bag chain or key chain.
- Customize your lip balm holder with different yarn colors and decorations.
- Attach buttons to make your lip balm holder more functional.
- Get creative and make the lip balm holder uniquely yours.
- A fun and practical project that you can do at home.
FAQ
Q: Can I use a different yarn weight for this project?
A: Yes, you can experiment with different yarn weights to achieve different results. Just keep in mind that it may affect the size and structure of the lip balm holder.
Q: Can I use different types of buttons?
A: Absolutely! Feel free to use any buttons you like or even mix and match different sizes and styles for a unique look.
Q: Is this project suitable for beginners?
A: Yes, this project is suitable for beginners. The step-by-step instructions provided in the tutorial will guide you through each stage of the process.
Q: Can I use this lip balm holder for other purposes?
A: Of course! While it is designed to hold lip balm, you can also use it to hold other small items like USB drives or small cosmetic products.
 WHY YOU SHOULD CHOOSE BEAUTYBADY


