Easy Crochet Tutorial: Make a Sweater for Any Size
Table of Contents
- Introduction
- Materials Needed
- Starting the Sweater
- Making the Yoke
- Dividing the Yoke
- Increasing for Sleeves, Front, and Back
- Working the Body
- Adding Rows in Double Crochet and Single Crochet
- Changing Colors
- Joining the Front and Back
- Adding Elastic Stitch
- Working on the Sleeves and Neck
- Starting the Sleeves
- Decreasing Stitches
- Finishing the Sleeves
- Working on the Neck
- Conclusion
How to Make a Cute Sweater for Beginners
Crocheting is a wonderful hobby that allows you to create beautiful and practical items. In this tutorial, I will guide you step by step on how to make a cute sweater, perfect for beginners. With just a few simple stitches and some basic materials, you will be able to create a cozy sweater that you can wear or gift to someone special.
Materials Needed
Before we begin, let's gather all the materials needed for this project. You will need:
- 110g of gray wool (4mm)
- 50g of white wool
- Two crochet hooks: one in 4mm and another in 3mm for elastic stitches
Make sure to choose a soft and comfortable wool that suits your preference. Additionally, having multiple crochet hooks will allow you to create different stitches and textures in your sweater.
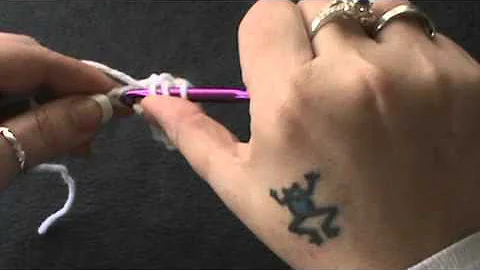
Starting the Sweater
To start off, you need to take measurements of the head contour and make a chain of the same size. It's important that the number of chains is odd. For example, for a head contour of 44cm, you can make a chain of 64 chains.
Making the Yoke
The first step in creating the sweater is to make the yoke. The yoke is divided into sleeves, front, and back. I will guide you on how to divide the stitches and create the necessary rows.
Dividing the Yoke
Divide the yoke as follows: 13 stitches for each sleeve, 21 stitches for the back, and 21 stitches for the front. If you want to make the sweater bigger or smaller, simply divide the stitches by 4 and adjust the number of stitches for each part.
Increasing for Sleeves, Front, and Back
Once you have divided the yoke, you will start working on the sleeves, front, and back separately. Follow the instructions below for each part:
- Sleeves: Start with 4 chains and make 1 double crochet in the same stitch. Continue with 12 double crochet stitches. In total, you should have 13 double crochet stitches. Make 1 chain and then 1 double crochet in the same stitch. This completes one sleeve. Continue with 20 double crochet stitches for the front. In total, you should have 21 double crochet stitches.
- Front: Make 1 chain and then 1 double crochet in the same stitch. Continue with 12 double crochet stitches. This creates the second sleeve. Make 1 chain and then continue with 19 double crochet stitches. The 3 chains at the beginning count as 1 double crochet stitch.
- Back: End the row with a slip stitch.
Repeat this row until you have the desired measurement from the shoulder to under the arm. For example, if you have worked for 10 cm (4 inches), the shoulder to under the arm measurement should be 12 cm (5 inches). The chest contour should be around 56 cm (22 inches).
Working the Body
Now that you have completed the yoke, it's time to work on the body of the sweater. Follow the steps below to add rows in double crochet and single crochet:
- Start row: Make 4 chains and then 1 double crochet in the same stitch. Work in the back loop single crochet and double crochet sequence until the end of the row. Always end the row with a back loop single crochet in the corner stitch.
- Corner stitch: In the corner stitch, make 1 double crochet, 1 chain, and 1 double crochet in the same stitch. Continue with the back loop single crochet and double crochet sequence until you reach the next corner.
- Repeat sequence: In each corner, make 1 double crochet, 1 chain, and 1 double crochet in the same stitch. Continue with the back loop single crochet and double crochet sequence until the end of the row.
- Finish row: End the row with a slip stitch.
Repeat this row until you have the necessary measurement from the shoulder to under the arm. For example, if you have worked for 16 rows and achieved a length of 16 cm (6 inches), it's time to change the hook to 3mm.
Adding Elastic Stitch
To add elasticity to the sweater, switch to a 3mm crochet hook and use the elastic stitch. Follow the instructions below:
- Make 3 chains and then alternate between back post double crochet and front post double crochet stitches until the end of the row.
- End the row with a front post slip stitch.
Repeat this row for 4 more rows to create elasticity.
Working on the Sleeves and Neck
Now it's time to work on the sleeves and neck of the sweater. Follow the steps below for each part:
Starting the Sleeves
Start the sleeves from under the arm and follow the stitch sequence:
- Make 3 chains, 1 single crochet, 1 double crochet, 1 back loop single crochet, and 1 double crochet. Repeat this sequence until the end of the row.
- End the row with a slip stitch.
Decreasing Stitches
To shape the sleeves, decrease stitches for five rows. Knit 1 stitch at the beginning and end of each row. Follow the instructions below:
- Make 1 slip stitch, 1 chain, 1 double crochet, and back loop single crochet. Repeat this sequence until the end of the row.
- Finish the row with a turn, 1 slip stitch, 3 chains, and back loop single crochet. Repeat this sequence until the end of the row.
- In the last row, make 1 double crochet without ending and 1 slip stitch. By following this method, you will avoid creating holes in the sweater.
Finishing the Sleeves
Once you have worked on the sleeves, continue knitting until you have reached a length of 17 cm (6.5 inches). Make sure to follow the same stitch sequence as the body of the sweater.
Working on the Neck
To prevent the sweater from entering through the head, switch back to the 4mm crochet hook for the neck. Follow the instructions below to create the elastic stitch:
- Make 3 chains and then alternate between back post double crochet and front post double crochet stitches.
- Repeat this row for 5 rows.
Conclusion
Congratulations! You have successfully made a cute sweater for beginners. Remember, this tutorial is just a starting point, and you can add your own personal touches to make it unique. If you need a written or graphic pattern, check out my Ravelry store and blog for more information. Don't forget to subscribe to my channel for more crochet tutorials. Thank you for joining me, and happy crocheting!
Highlights
- Learn how to make a cute sweater suitable for beginners in crochet
- Step-by-step instructions with clear and detailed explanations
- Uses basic stitches such as double crochet and single crochet
- Provides measurements and adjustments for different sizes
- Includes tips on switching colors and creating elastic stitches
FAQ
Q: Can I use different colors for the sweater?
A: Yes, you can choose any colors you like to make the sweater more personalized.
Q: Can I adjust the size of the sweater?
A: Yes, you can adjust the size by dividing the stitches differently or adding or subtracting rows.
Q: How long does it take to complete the sweater?
A: The time it takes to complete the sweater can vary depending on your crochet speed, but it is a relatively quick project.
Q: Can I make this sweater for a child or an adult?
A: Yes, you can adjust the size to make the sweater suitable for both children and adults. Just make sure to take accurate measurements.
Q: Can I sell the sweaters I make using this pattern?
A: Yes, you can sell the finished products made using this pattern.
 Beauty


 WHY YOU SHOULD CHOOSE BEAUTYBADY