Create a Stylish Macrame Bag Dispenser | Easy DIY Tutorial
Table of Contents
- Introduction
- Materials Needed
- Step 1: Attaching the Wooden Hoop
- Step 2: Joining the Cords
- Step 3: Creating Rows of Square Knots
- Step 4: Adding Alternating Rows
- Step 5: Filling in the Back Portion
- Step 6: Measuring and Finishing Touches
- Step 7: Wrapping Knot at the Bottom
- Final Result: Using the Macrame Reusable Bag Holder
Introduction
Are you tired of having a messy pile of plastic bags cluttering up your kitchen? Look no further! In this article, we will show you how to create a DIY macrame reusable bag holder that is not only functional but also adds a touch of cuteness to your home decor. With just a few materials and simple steps, you can have a stylish and practical solution for storing your reusable bags. Let's get started!
Materials Needed
Before we begin, let's gather all the materials that you'll need for this project:
- One 3.5 centimeter wooden hoop
- One 200 centimeter length of cord
- Twenty-five lots of 170 centimeter length of cord
- One 40 centimeter length of cord
- Scissors
- Tape measure
Now that you have everything ready, let's move on to the first step.
Step 1: Attaching the Wooden Hoop
To start, grab the wooden hoop and place it on two sturdy hooks or any other support that allows you to work comfortably. Take the 200 centimeter length of cord and fold it in half. The midpoint should be at the folded end. Now, pass the loop formed by the cord through the wooden hoop from front to back. Insert the ends of the cord through this loop and pull to tighten. This will create a large head knot that will hold the hoop securely in place.
Step 2: Joining the Cords
Next, take the twenty-five lots of 170 centimeter length cords and fold them in half. For the first cord, attach it to the left side of the hoop by using a reverse larks head knot. Instead of going over, as you usually would, come from behind, pass the loop over, and then insert the two cords through the loop. Repeat this process for the other cords, ensuring there are twelve on each side. Finally, use the last cord to join the two sides together by making a larks head knot, just like we did with the wooden hoop.
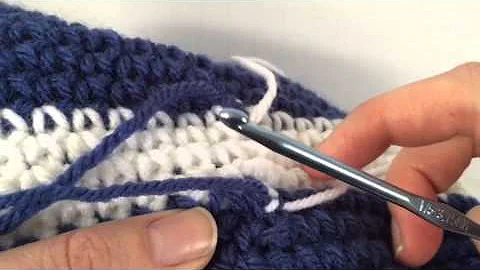
Step 3: Creating Rows of Square Knots
Now that the base is set up, it's time to start creating the rows of square knots. Begin by taking four cords from the top of the wooden hoop and tie a square knot. To do this, place the fourth cord over the middle two cords, then take the first cord and pass it in front of the fourth cord, behind the middle two cords, and through the loop created by the first cord. Tighten the knot securely. Repeat this process, using the next set of four cords, and continue around the whole base, creating rows of square knots.
Step 4: Adding Alternating Rows
To add visual interest and texture to the macrame bag holder, we will now introduce alternating rows of square knots. Flip the structure around and start by selecting two cords from the left side and two cords from the right side of the previous square knots. Tie them together using a square knot in the middle, joining the two sides together at the back. Move on to the next set of cords and repeat the process until you have completed a row of alternating square knots.
Step 5: Filling in the Back Portion
To achieve a finished look without any gaps, we need to fill in the back portion of the bag holder. Simply continue creating alternating rows of square knots until the back matches the front. Measure the length of your bag holder from the bottom middle point to the bottom. In our case, it was 21 centimeters in length. Keep adding rows until you reach your desired length.
Step 6: Measuring and Finishing Touches
Once you've reached your desired length, it's time to add a wrapping knot at the bottom to secure the cords in place. Take the 40 centimeter length of cord and wrap it tightly around all the cords near the bottom. Leave a small tail at the top and create a loop at the bottom. Pass the long cord through the loop and pull the small tail to close the loop and secure the cord. Trim any excess cords and neaten the bottom of the tassel.
Step 7: Wrapping Knot at the Bottom
Finally, all that's left to do is to grab your reusable bags and proudly display them in your DIY macrame bag holder. Fill it up and enjoy the convenience of having your bags neatly organized and easily accessible. Not only is this holder perfect for storing reusable bags, but it can also be repurposed as a wine bag or even a propagation tool for plants.
Final Result: Using the Macrame Reusable Bag Holder
In conclusion, creating a macrame reusable bag holder is a fun and practical way to add some charm to your home while keeping your kitchen organized. It's a simple project that anyone can do, and the end result is both functional and aesthetically pleasing. Say goodbye to the plastic bag clutter and hello to a stylish storage solution!
Highlights
- DIY macrame reusable bag holder adds functionality and style to your home decor.
- Simple steps and minimal materials make this project accessible for everyone.
- Alternating rows of square knots create texture and visual interest.
- The use of a wooden hoop provides stability and support for the bag holder.
- The finished product can be used not only for storing reusable bags but also as a wine bag or propagation tool for plants.
FAQ
Q: Can I use a different size or type of hoop for this project?
A: Yes, you can experiment with different hoop sizes and materials. Just make sure it is sturdy enough to hold the weight of the bags.
Q: How many reusable bags can the macrame bag holder hold?
A: The number of bags that the holder can accommodate depends on their size and thickness. It is designed to hold a substantial amount, ensuring a clutter-free kitchen.
Q: Can I customize the length of the macrame bag holder?
A: Absolutely! The length can be adjusted according to your preference by adding or reducing the number of rows of square knots.
Q: Is this project suitable for beginners in macrame?
A: Yes, this project is beginner-friendly and a great way to learn and practice basic macrame techniques.
Q: Can I use this bag holder for storing other items apart from reusable bags?
A: Yes, you can use this versatile bag holder to store various items such as scarves, belts, or even small towels in your bathroom.
Q: How long does it take to complete this DIY project?
A: The time required to complete the macrame bag holder depends on your skill level. On average, it can be completed in a few hours.
Q: Is it necessary to use specific types of cords for this project?
A: While it is recommended to use macrame cords for consistency and durability, you can experiment with other types of cords that suit your preferences. Just ensure they are strong enough to support the weight of the bags.
Q: Can I wash the macrame bag holder?
A: Yes, you can gently hand wash the bag holder if needed. However, avoid submerging the wooden hoop in water to prevent damage.
Q: Can I use this bag holder to store plastic bags instead of reusable ones?
A: Absolutely! This bag holder can effectively store both reusable and plastic bags, providing a practical and organized solution for your kitchen.
 Beauty


 WHY YOU SHOULD CHOOSE BEAUTYBADY