Beginner's Guide to Crocheting Adorable Baby Boots
Table of Contents
- Introduction
- Materials needed
- Making the base of the baby shoe
- 3.1. Crocheting the base
- 3.2. Creating the back loop stitches
- Shaping the baby shoe
- 4.1. Adding rows for the toe area
- 4.2. Creating a strap for the shoe
- Sewing the baby shoe
- 5.1. Folding and stitching the shoe together
- 5.2. Attaching the ribbon
- Making the brim of the shoe
- 6.1. Crocheting the ankle area
- 6.2. Creating front post and back post stitches
- Final touches and finishing
- Conclusion
How to Make Adorable Crochet Baby Shoes
Crochet baby shoes are a wonderful and cute addition to any little one's wardrobe. They make for great gifts and can be customized with different colors to match any outfit. In this tutorial, I will show you step-by-step how to make your very own crochet baby shoes. Don't worry if you're new to crochet, this project is perfect for beginners.
Introduction
Crocheting baby shoes is a fun and rewarding project that allows you to put your creativity to use. These baby shoes are suitable for babies aged 6 months to 1 year old and can be easily adjusted to fit different sizes. With just a few materials and basic crochet stitches, you'll be able to create a pair of adorable baby shoes that will surely be cherished.
Materials needed
Before we get started, let's gather all the materials we'll need for this project:
- Yarn (in any color of your choice)
- Crochet hook (size 2mm)
- Scissors
- Yarn needle
Making the base of the baby shoe
3.1. Crocheting the base
To begin, we'll start by making the base of the baby shoe. This will serve as the foundation for the rest of the shoe. Using the yarn and crochet hook, create a slip knot. Make 30 chains and then single crochet into the second chain. Continue making single crochets into each chain until you reach the end. Chain one and turn your work.
3.2. Creating the back loop stitches
In this step, we'll be creating back loop stitches to give the base of the shoe some texture. Skip the first chain and make a single crochet into the first stitch, but only through the back loop. Continue making single crochets into the back loops of each stitch. Repeat this process for 8 rows, making sure to chain one and turn your work at the end of each row.
Shaping the baby shoe
4.1. Adding rows for the toe area
Now that we have the base of the shoe, we'll start shaping the toe area. Skip 9 stitches on each side of the base and place a marker in the 10th stitch. Repeat this on the other side as well. Chain one and turn your work. Make single crochets into the next 10 single crochets, but only through the back loop. Continue this pattern for 8 rows, chaining one and turning your work at the end of each row.
4.2. Creating a strap for the shoe
To create a strap for the shoe, fold the piece in half and use a 2-yard thread to work a running stitch along the middle. Skip 4 stitches and insert the needle at the fifth stitch. Make a knot at the end of the thread and pull it to tighten the stitches. Repeat this process for the other side of the shoe. Once done, make a little ribbon using white yarn and sew it onto the shoe for added decoration.
Sewing the baby shoe
5.1. Folding and stitching the shoe together
Now that we have all the components of the baby shoe, it's time to sew them together. Fold the piece in half and use a two-yard thread to work a running stitch along the edge, joining the two layers. Secure the thread with a knot at the end and cut off any excess thread.
5.2. Attaching the ribbon
To give the baby shoe a cute and finished look, we'll attach a ribbon. Using the white yarn, create a slip knot and chain nine. Single crochet into the second chain and continue making single crochets into each chain. Cut off the yarn, leaving a longer tail for sewing. Fold the sock in the middle and use a two-yard thread to work a running stitch along the edge, joining the two layers. Tie a knot at the end of the thread and cut off any excess.
Making the brim of the shoe
6.1. Crocheting the ankle area
To create the brim of the baby shoe, we'll start by crocheting the ankle area. Insert your hook into the back of the ankle side and create a chain of two. Make one double crochet into each row, continuing this pattern until you reach the corner. Make one double crochet into the next five stitches, then into the corner. Repeat this pattern for the other side of the shoe.
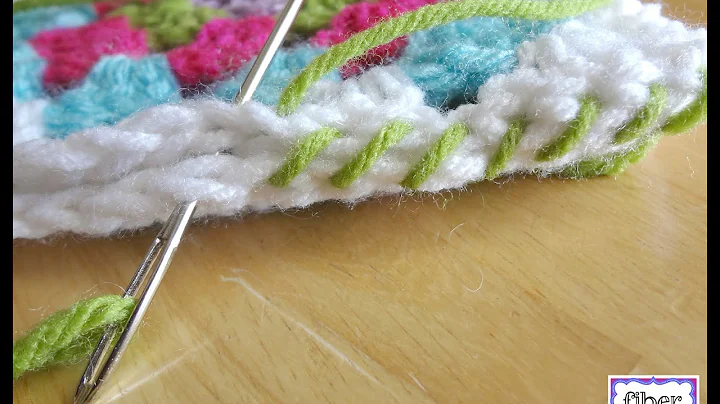
6.2. Creating front post and back post stitches
To add texture to the brim of the shoe, we'll be using front post and back post stitches. Insert your hook around the first double crochet, bring the yarn to the front, then back to the front, and finally around the double crochet. Make a front post double crochet. Continue alternating between front post and back post double crochets until you reach the end. Repeat this pattern for two rows, joining with a slip stitch around the top two chains. Chain two to start the next row.
Final touches and finishing
Continue making front post and back post double crochets for the next row with the pink yarn. Join with a slip stitch around the top chain two and cut off the pink yarn. Cut off the white yarn as well. Congratulations, you have completed your crochet baby shoes! Enjoy the adorable and handmade footwear for your little one or give it as a gift.
Conclusion
Crocheting baby shoes is a satisfying and enjoyable project, allowing you to create unique and personalized items for your little ones. With just a few basic crochet stitches and some yarn, you can make adorable shoes that will surely be treasured. Get creative with colors and embellishments to make each pair unique. So grab your crochet hook and start making these cute little shoes!
Highlights
- Easy-to-follow tutorial on how to crochet baby shoes
- Suitable for beginners
- Customizable with different colors and yarns
- Includes step-by-step instructions and detailed photos
FAQ
Q: Can I adjust the size of the baby shoes?
A: Yes, you can easily adjust the size by adding or subtracting stitches and rows.
Q: Is this project suitable for beginners?
A: Absolutely! This tutorial is perfect for beginners who want to try crocheting baby shoes.
Q: Can I use different colors of yarn?
A: Of course! Feel free to use any colors of yarn that you like to customize the shoes to your preference.
 Beauty


 WHY YOU SHOULD CHOOSE BEAUTYBADY