Adorable Crochet Bunny Bookmark Tutorial
Table of Contents
- Introduction
- Materials Needed
- Creating the Magic Circle
- Round 1: Single Crochets
- Round 2: Increasing the Stitches
- Round 3: Continuing the Increase
- Round 4: More Increases
- Round 5: Adding Shape to the Body
- Rounds 6-10: Creating the Main Body
- Round 11: Starting the Mouth
- Round 12: Single Crochets in the Mouth
- Round 13: Decreasing Stitches
- Round 14: Single Crochets in All Stitches
- Round 15: Further Decreasing Stitches
- Finishing Off the Bookmark
How to Create a Squished Bunny Bookmark
Are you looking for a fun and cute crochet project? Look no further than the squished bunny bookmark! This adorable bookmark is not only practical but also adds a touch of whimsy to any book. In this tutorial, I will guide you through the step-by-step process of creating your own squished bunny bookmark using simple crochet techniques.
Materials Needed
Before we begin, let's gather all the materials you will need for this project:
- Yarn: Payton's Grace in green, orange, red, black, and white
- Crochet hook: 2.75mm
- Yarn needle
Now that you have all the necessary supplies, let's get started with creating the magic circle.
Creating the Magic Circle
To start this project, we will begin by creating a magic circle. This will serve as the foundation for our squished bunny bookmark. Follow these steps to create the magic circle:
- Hold the end of the yarn and wrap it around your index and middle fingers twice, creating a loop.
- Insert your crochet hook into the loop and grab the working yarn.
- Pull the working yarn through the loop, creating a chain stitch.
- Chain one to secure the loop.
- Insert six single crochets into the loop.
- To do this, insert your hook into the loop, yarn over, and pull through, then yarn over again and pull through both loops on your hook.
- Pull the loose end of the yarn to tighten the circle.
Now that we have the magic circle in place, we can move on to the next step: creating the rounds.
Round 1: Single Crochets
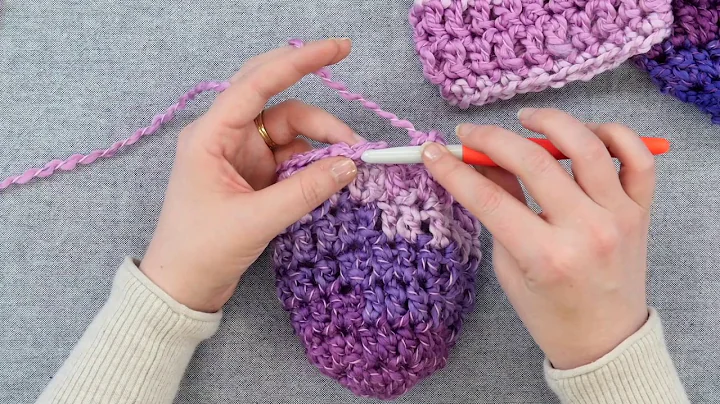
In round 1, we will be working single crochets into the stitches of the magic circle. Here's how to proceed:
- Insert your hook into the first stitch of the magic circle.
- Yarn over and pull through the stitch.
- Yarn over again and pull through both loops on your hook.
- Repeat steps 1-3 five more times to complete the round.
- Pull the loose end of the yarn to tighten the circle.
Congratulations! You have completed round 1. Now let's move on to round 2.
Round 2: Increasing the Stitches
In round 2, we will be increasing the number of stitches by working two single crochets into each stitch from the previous round. Follow these steps to complete round 2:
- Insert your hook into the first stitch of round 1.
- Yarn over and pull through the stitch.
- Yarn over again and pull through both loops on your hook.
- Repeat steps 1-3 in the same stitch to create two single crochets.
- Move on to the next stitch and repeat steps 1-4 to create two more single crochets in that stitch.
- Continue working two single crochets in each stitch around the circle.
By the end of round 2, you should have twelve stitches in total. Let's move on to round 3.
Round 3: Continuing the Increase
In round 3, we will be continuing the increase by working one single crochet followed by two single crochets in the next stitch. Follow these steps to complete round 3:
- Insert your hook into the first stitch of round 2.
- Yarn over and pull through the stitch.
- Yarn over again and pull through both loops on your hook to create a single crochet.
- In the next stitch, work two single crochets.
- Repeat steps 1-4 in the remaining stitches around the circle.
At the end of round 3, you should have eighteen stitches in total. Let's move on to round 4.
Round 4: More Increases
In round 4, we will be increasing the stitches even further. Here's how to complete round 4:
- Work one single crochet in the first stitch of round 3.
- In the next two stitches, work one single crochet in each.
- In the fourth stitch, work two single crochets.
- Repeat steps 1-3 in the remaining stitches around the circle.
By the end of round 4, you should have twenty-four stitches in total. Let's move on to round 5.
Round 5: Adding Shape to the Body
In round 5, we will be adding shape to the body of the squished bunny bookmark. Here's how to proceed:
- Work three single crochets in the first stitch of round 4.
- In the next stitch, work two single crochets.
- Repeat steps 1-2 in the next two stitches.
- In the fifth stitch, work one single crochet.
- Repeat steps 1-4 in the remaining stitches around the circle.
By the end of round 5, you should have thirty stitches in total. This completes the shaping of the body.
Continued in Next Table Head


 WHY YOU SHOULD CHOOSE BEAUTYBADY